The KEYWORDS Tab
The KEYWORDS Tab provides fields and features to help you best categorize your track for algorithms, libraries, and search functions, and give your song the best odds for discovery when it counts.
Jump To...
- About the KEYWORDS Tab
- Keywords and Tagged Metadata
- Add Genre Information to a Track
- Create a New Genre
- Remove a Genre from a Track
- Keywords and Featured Instruments
- Add Keywords Using the Select Tags Field
- Add Keywords With the Category Selector
- Create a New Keyword
- Remove a Single Keyword from the Track
- Remove All Keywords from the Track
- Adding Keywords using Copy & Paste
- Sounds Like
- Cue Type
- Production Type
- Ideal For...
- Custom Keyword Groups
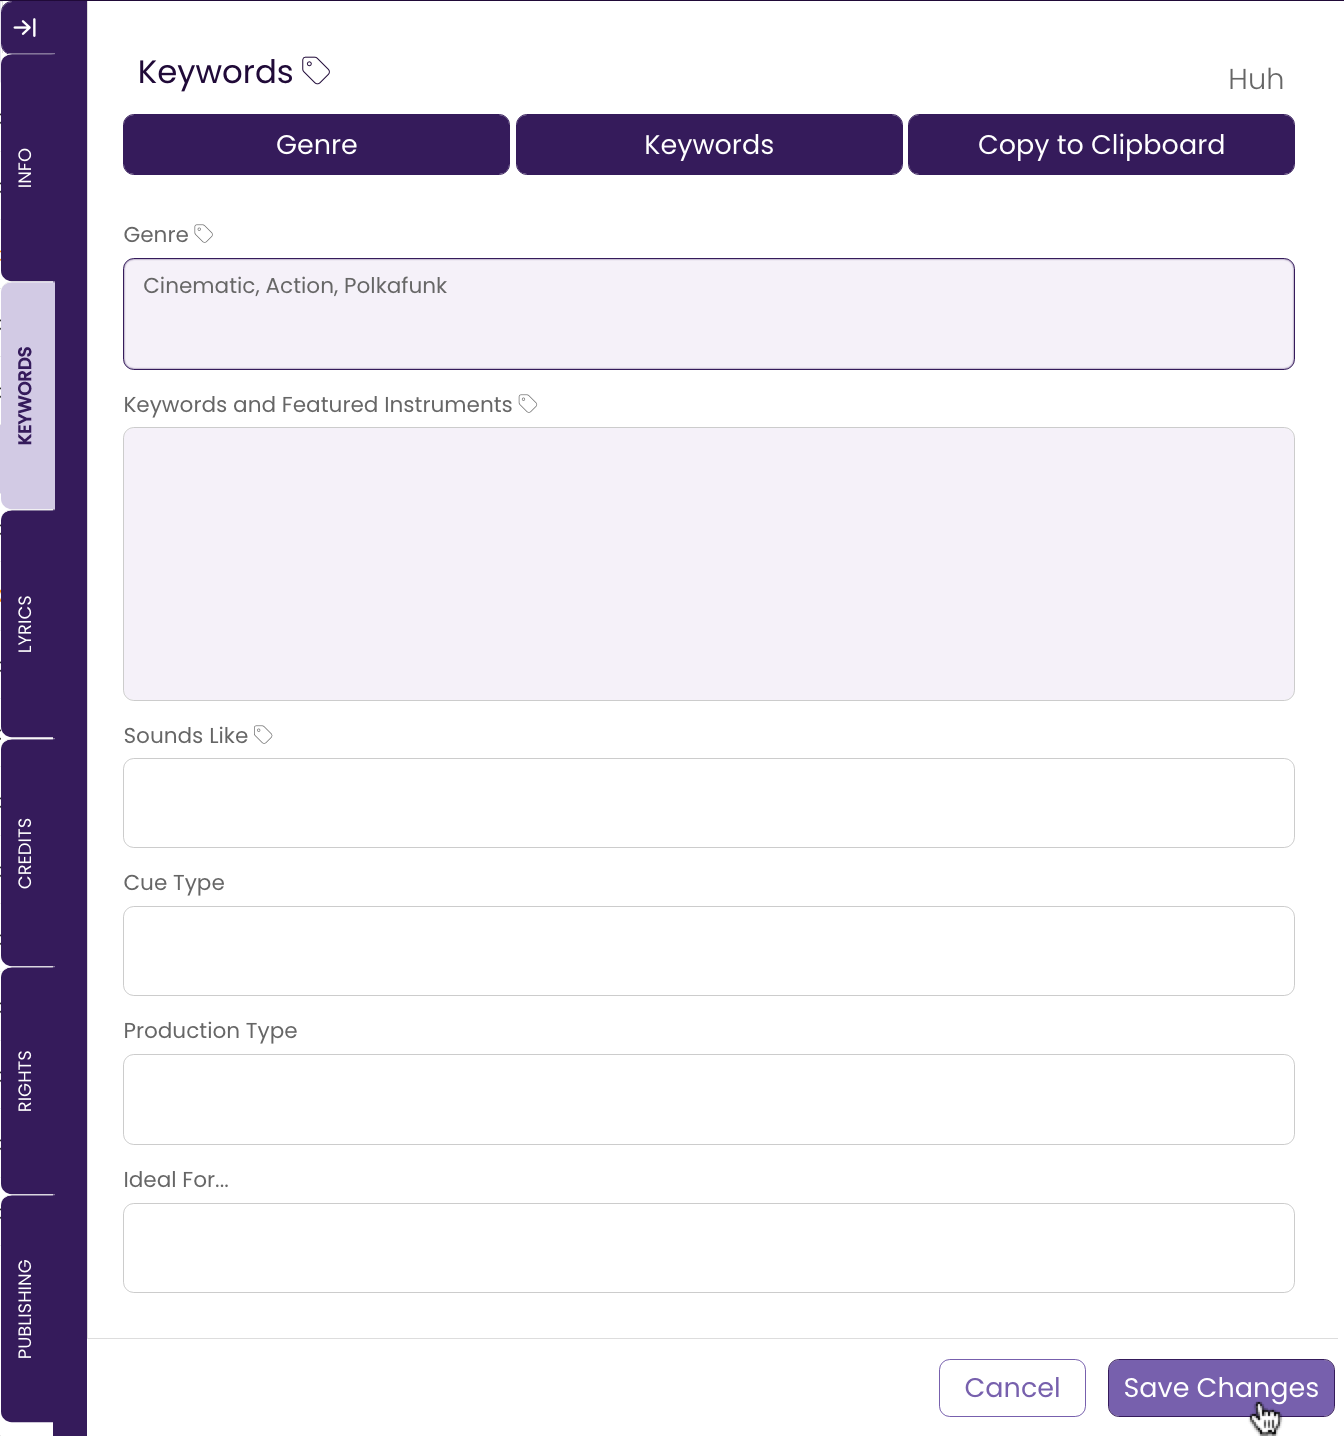
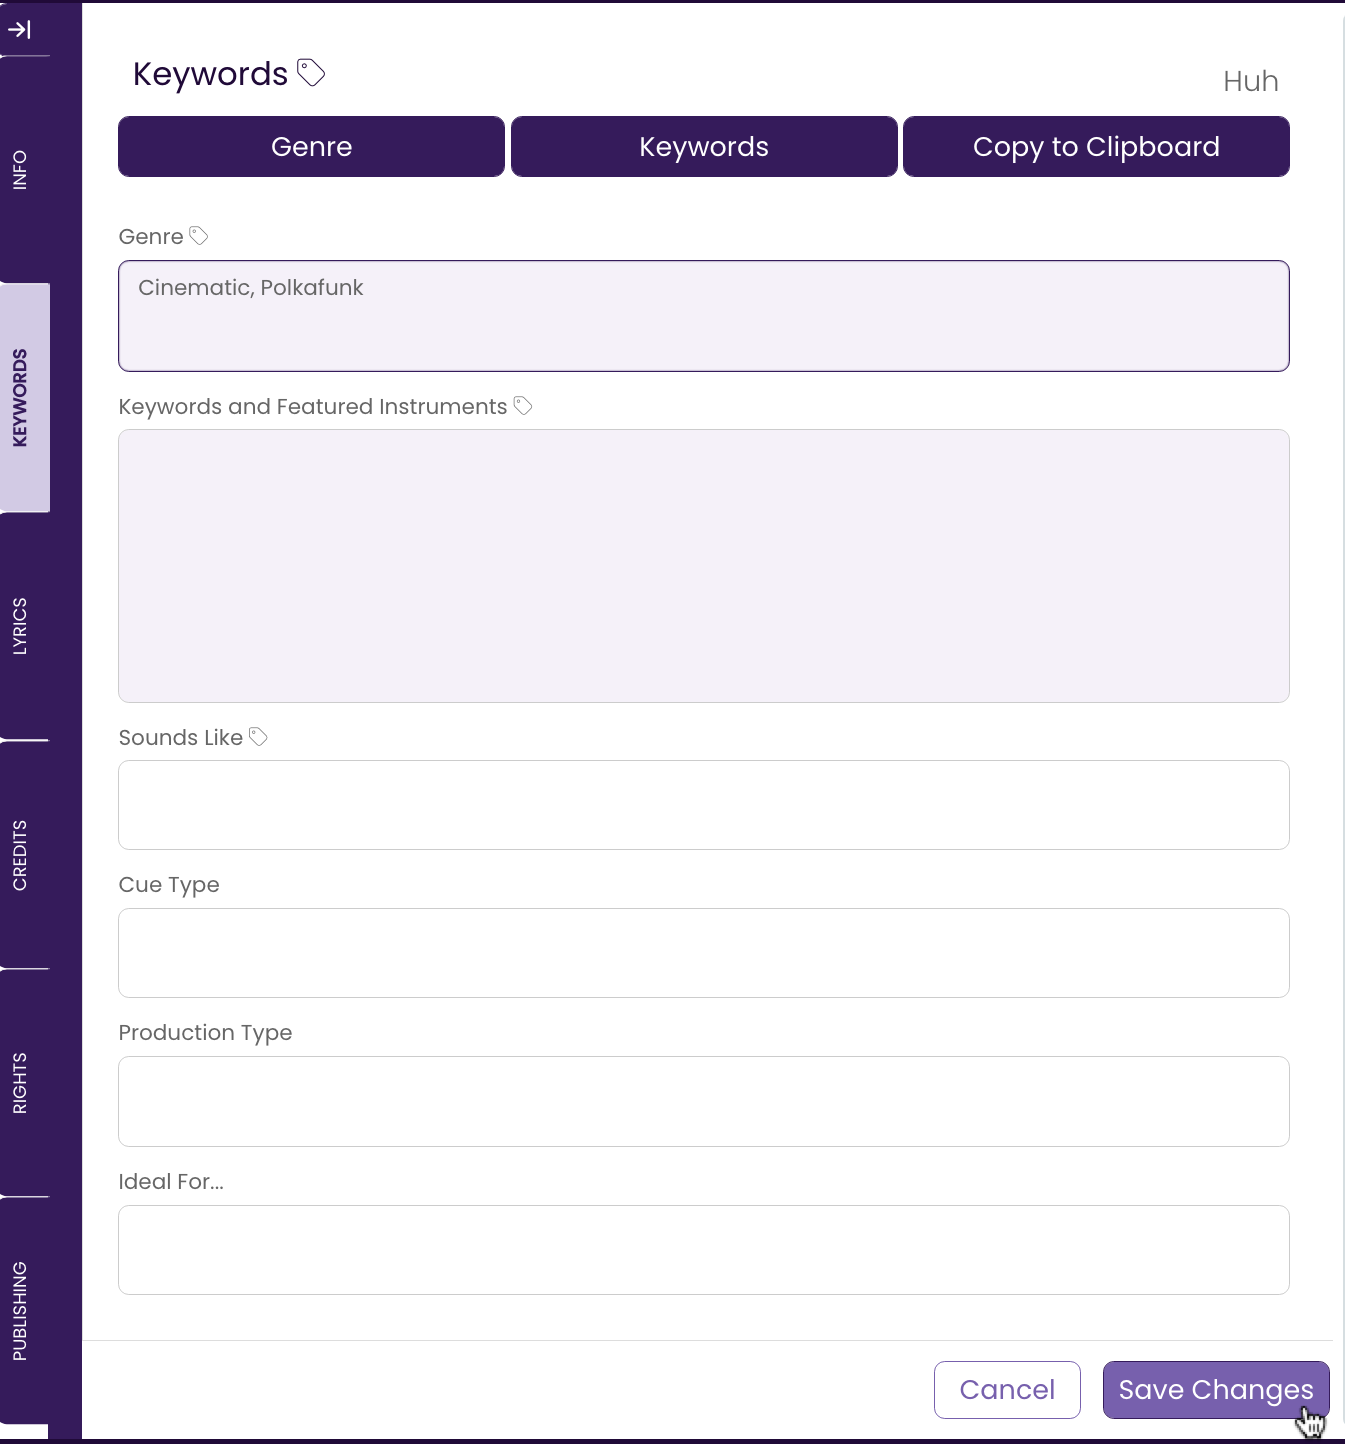
About the KEYWORDS Tab
The Keywords tab is found in the CATALOG module to the right of the screen second from the top of the Side Tabs. This is where you enter the Genre and other Keywords that will be added to your track’s metadata.
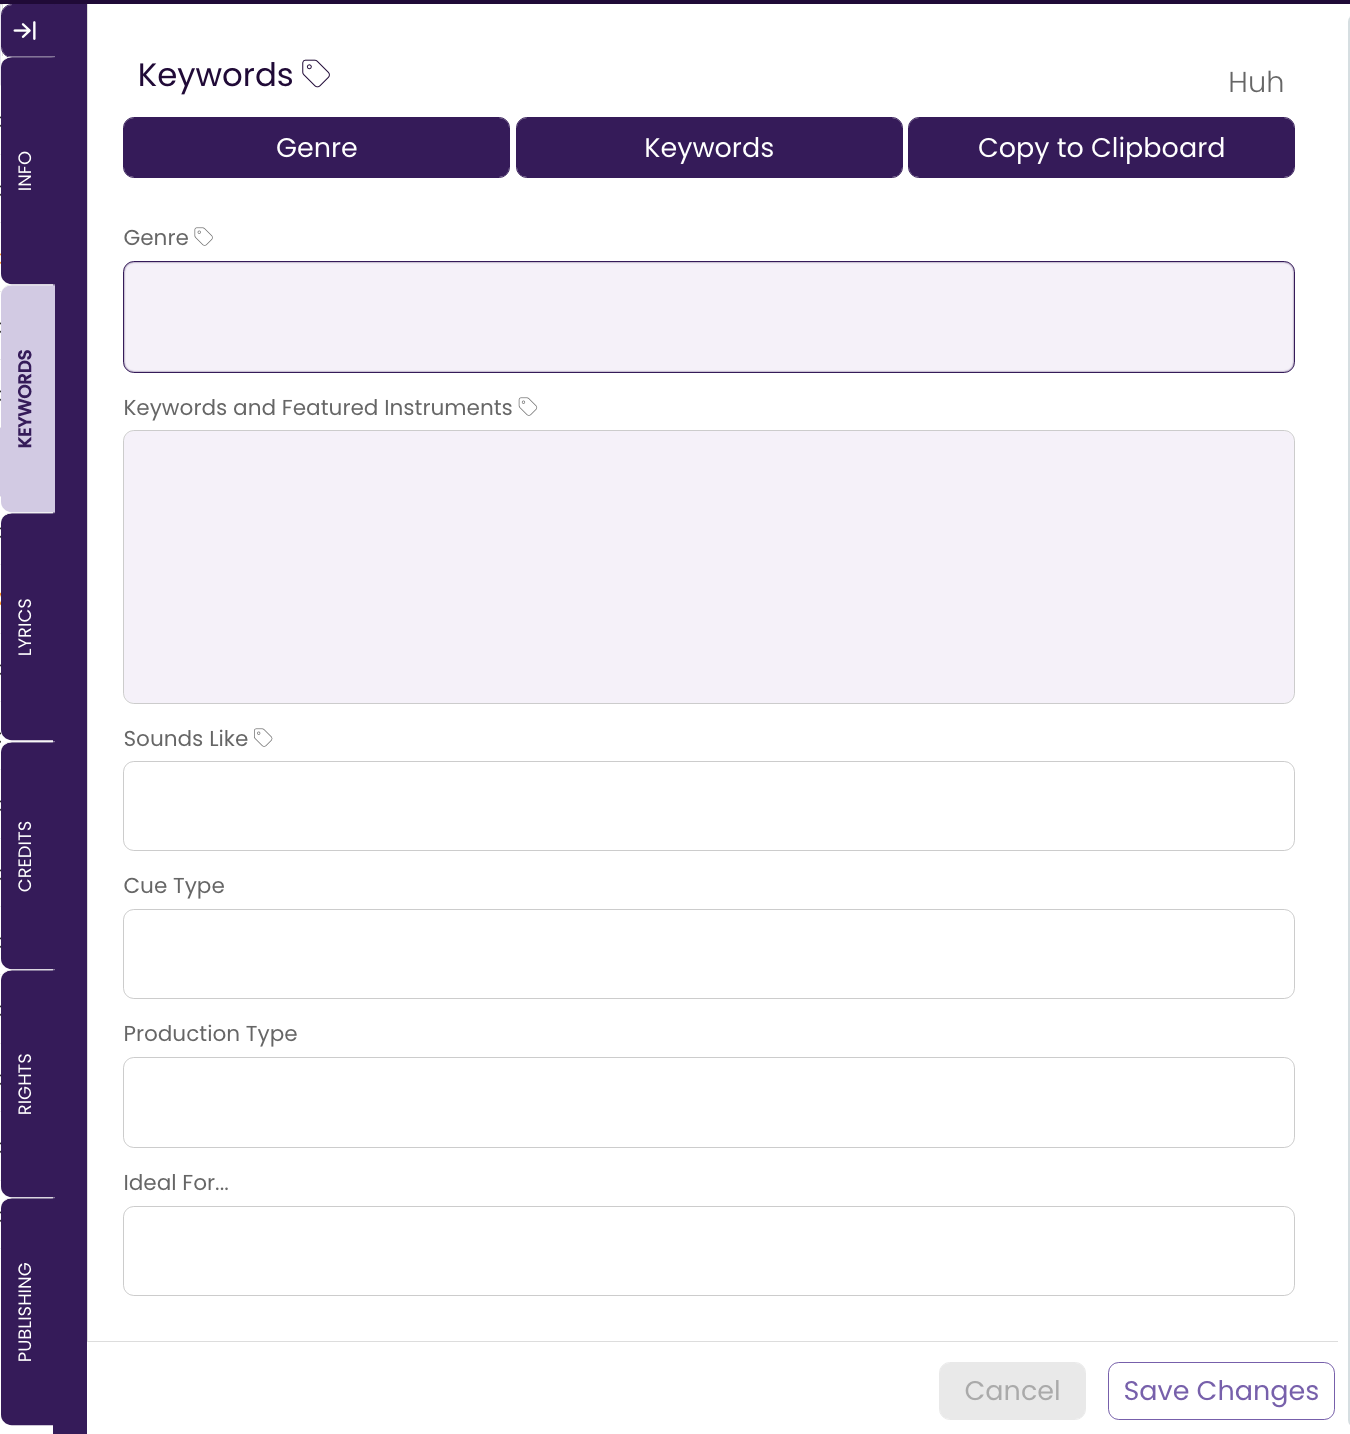
Keywords and Tagged Metadata
All the information in the KEYWORDS Tab will be added to your track’s metadata when you perform a Tag Files function.
Any Genre information existing on or added to your audio file will appear in the Genre metadata field on your track.
Data that is entered in any of the other fields on the KEYWORDS tab will be copied to the LYRICS field when metadata is tagged to your audio files.
Entering Keyword information
The Genre and Keywords/Featured Instruments fields offer a vast library of terms to choose from to help you come up with your metadata. The remaining fields are simple text entry.
While you will want to specify your genre in the Genre field so it shows up in the correct metadata field on your audio file, you can choose to enter all your other keywords into a single field if so desired. The separate fields are to help prompt you as you consider what tags to add.
Genre
Any Genre information existing on or added to your audio file will appear in the Genre metadata field on your track.
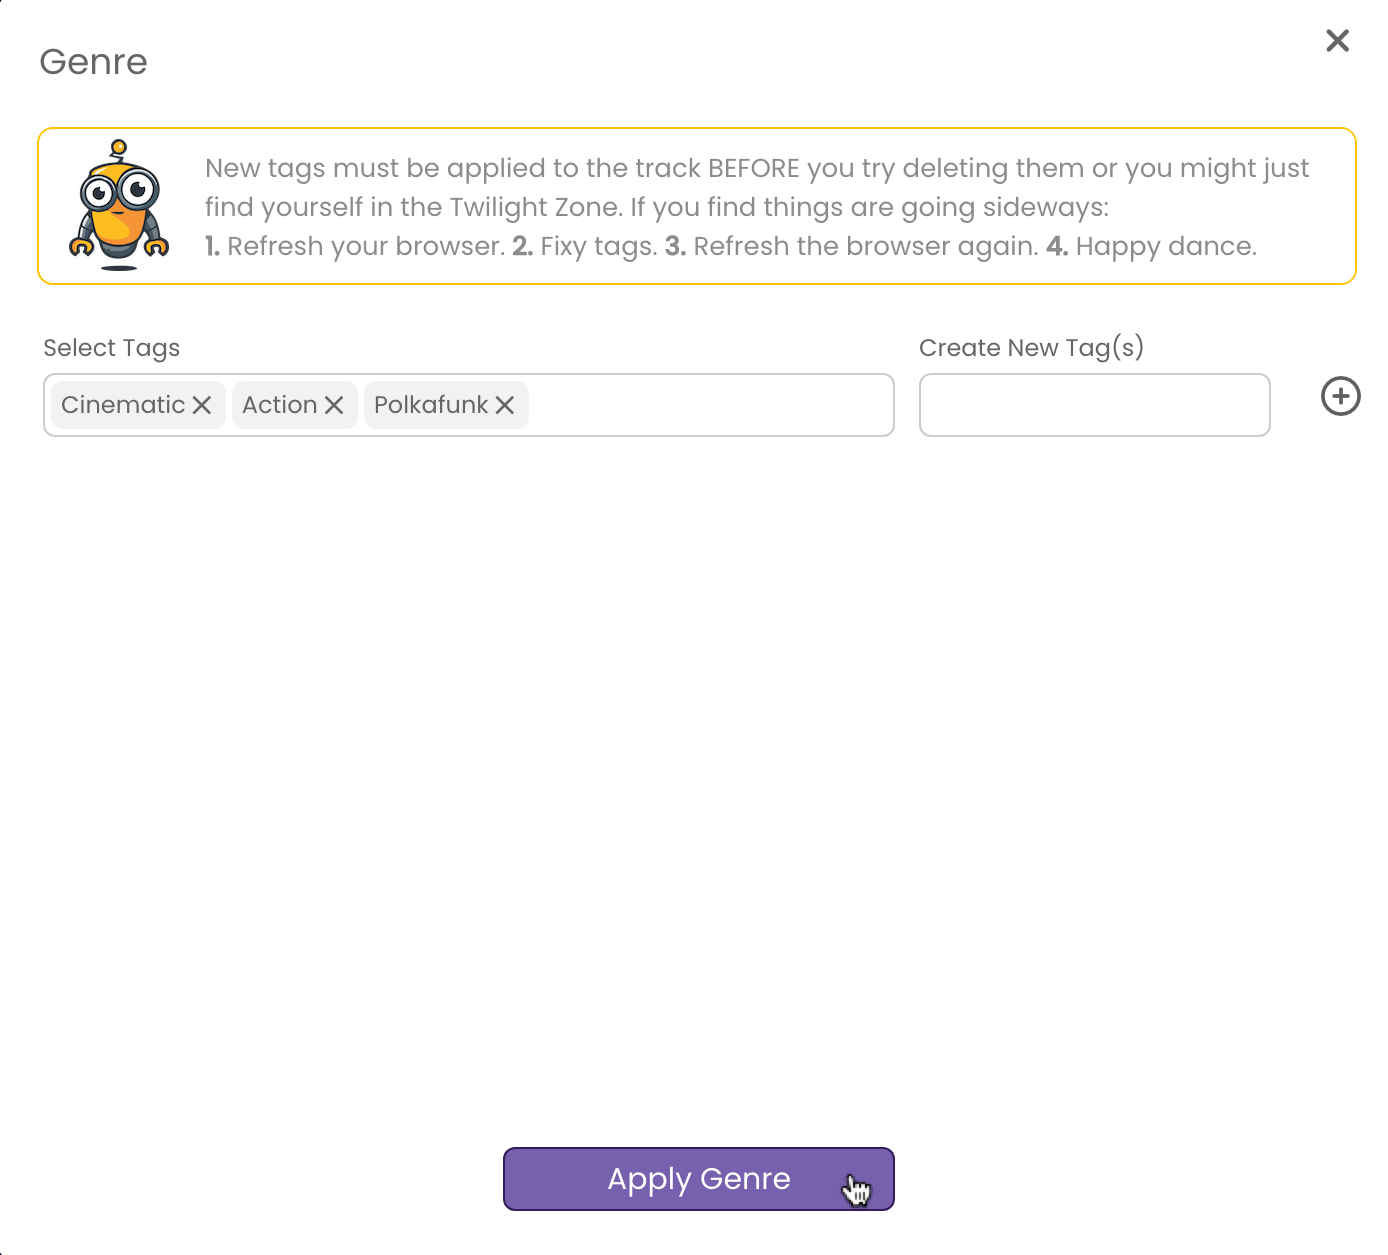
Add Genre Information to a Track
- Click in the Genre field.
The Genre window will open.
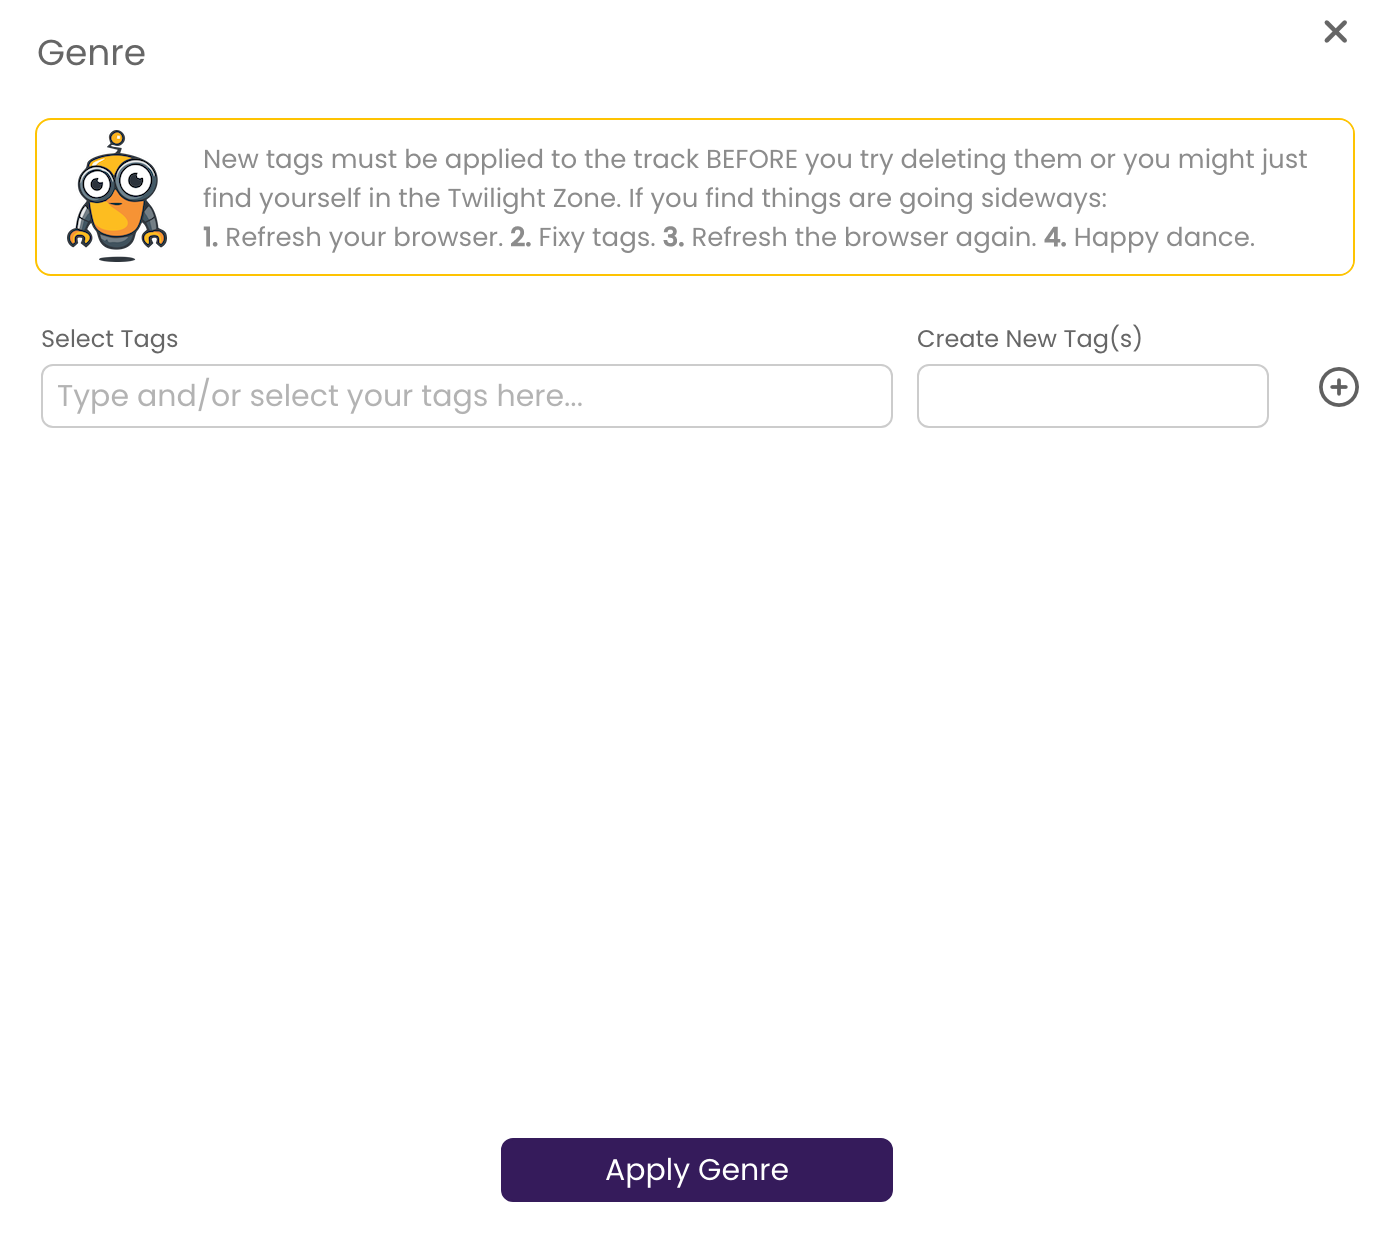
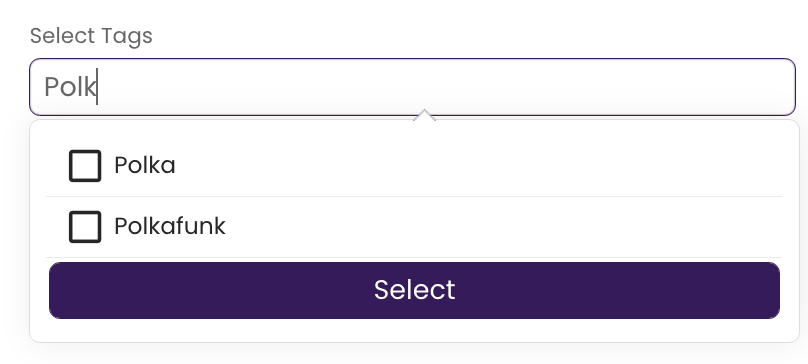
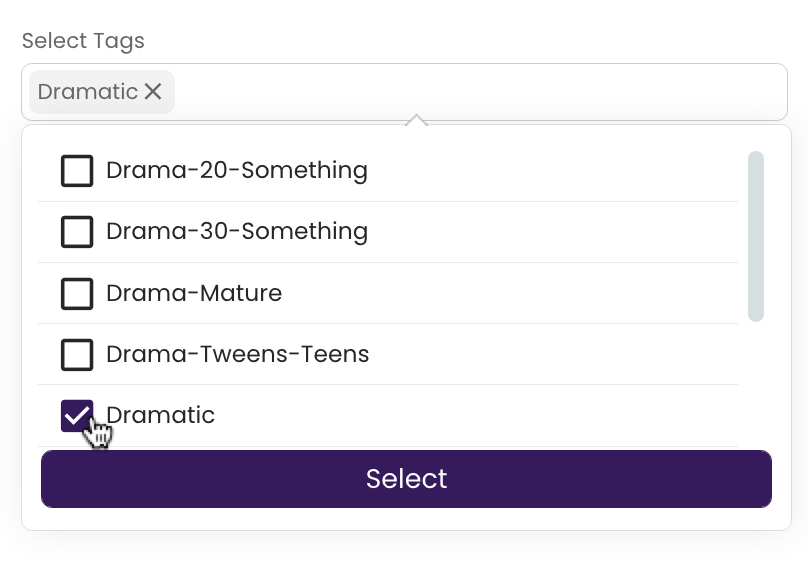
- Click in the Select Tags field.
Scroll through the list to find the desired genre or type your term into the Select Tags field to jump directly to available options containing your entered text.
Click in the box(es) next to the tags that you would like to add to your track.

- Click Select.
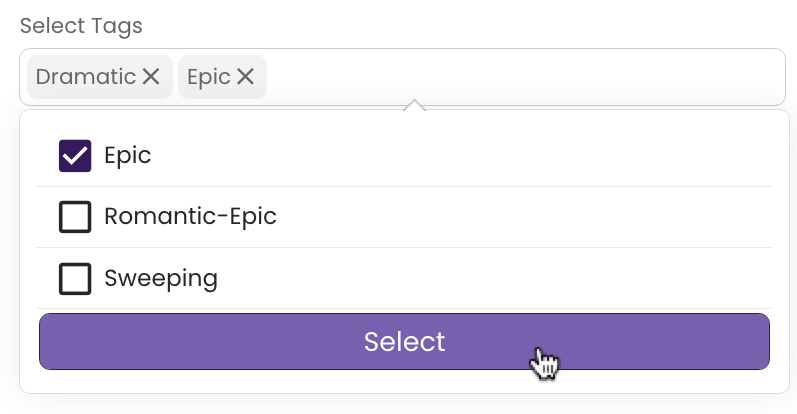
The genres appear in the Select Tags field. Alternately, you can simply click in the Select Tags field again.
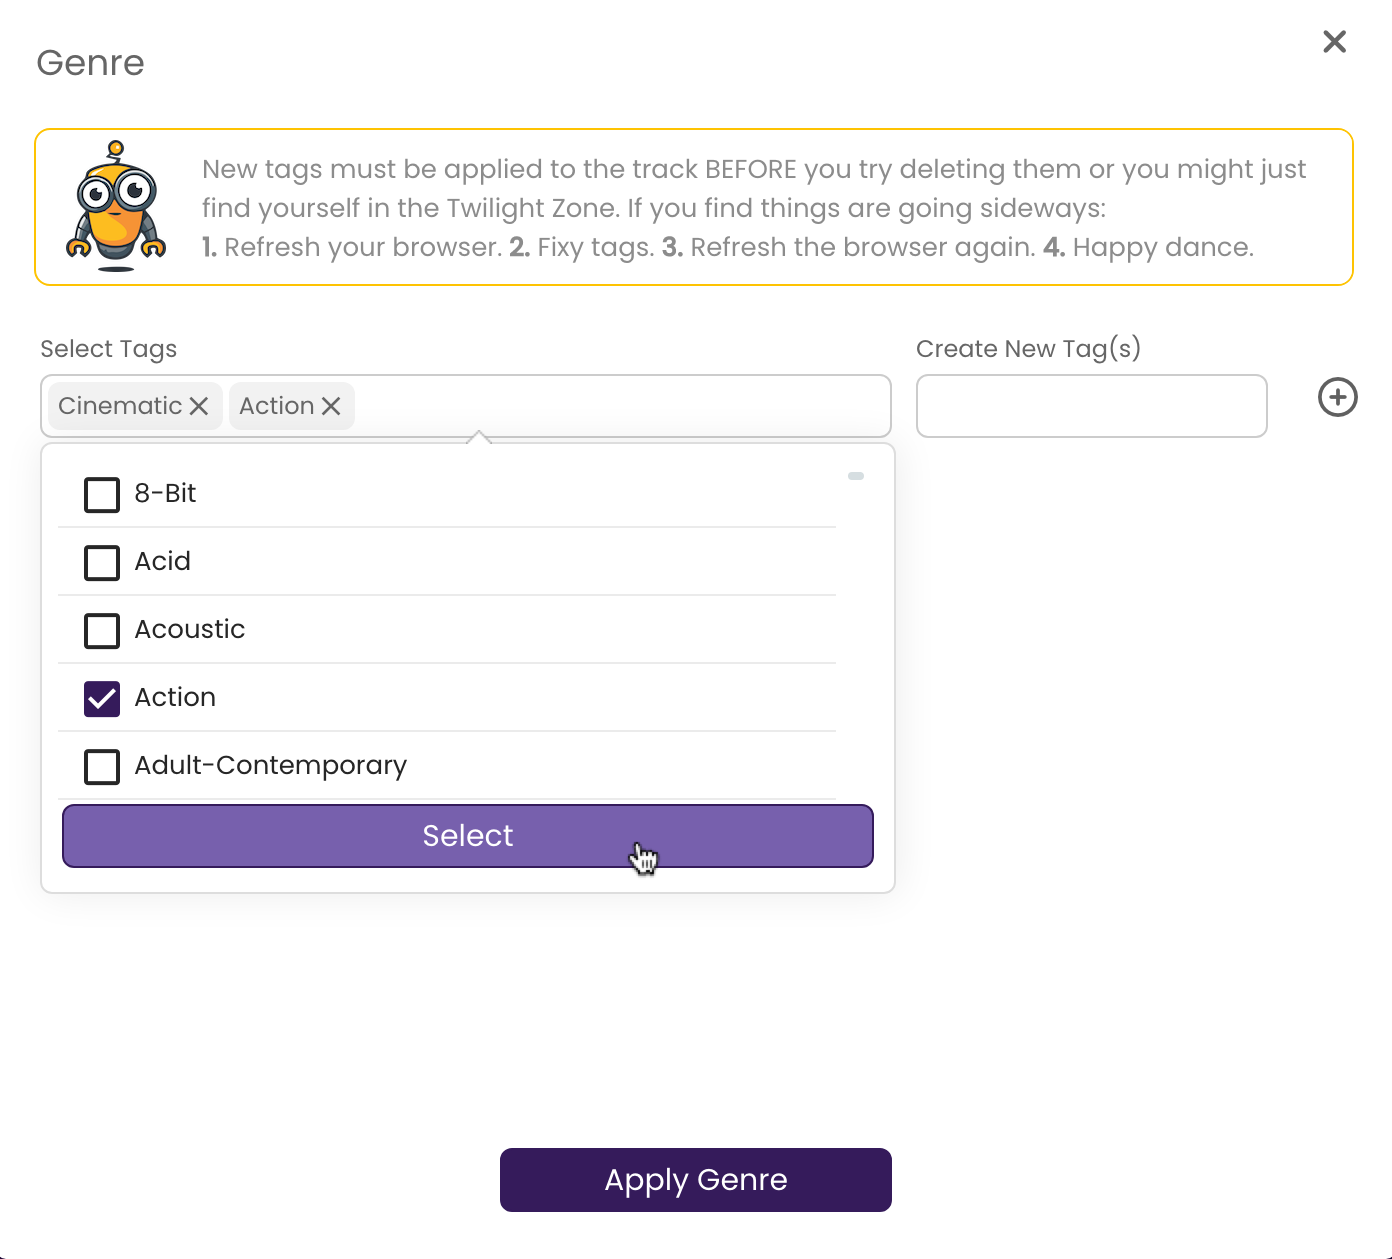
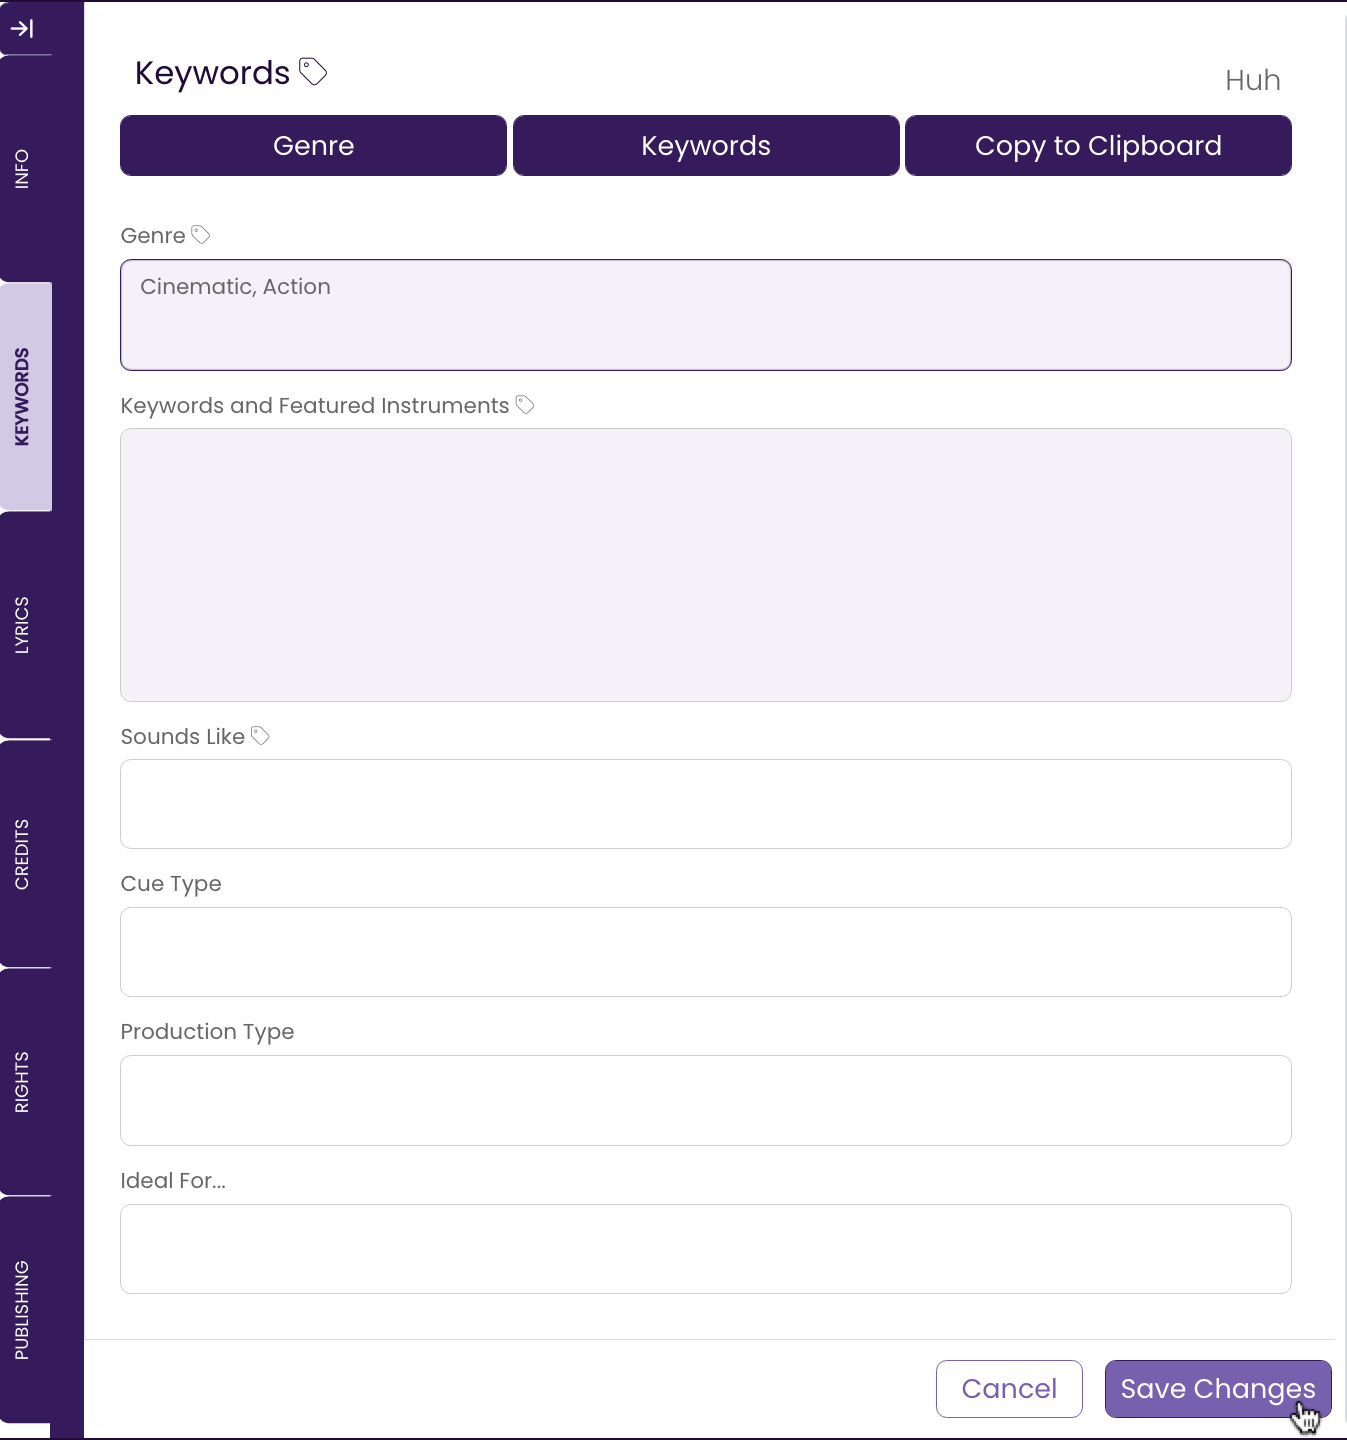
- Click Apply Genre.
The genres are applied to the track.

- Click Save Changes.
The genres are saved to the track.
Create a New Genre
- Click in the Create New Tag(s) field.
Enter the new Genre and click the icon.
icon.

The new genre is added to the Select Tags field. - Click Apply Genre.
The new genre is applied to the track.

- Click Save Changes.
The new genre is saved to the track and added to your TrackStage Keyword Library. - Refresh your Catalog.
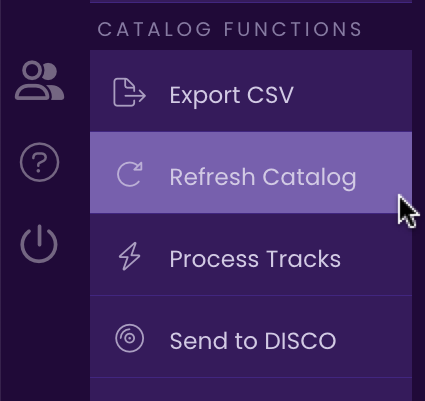 .
.
The new genre is now accessible through the Select Tags dropdown.
Remove a Genre from a Track.
- Make sure the genre is already applied to the track.
Click on Apply Genre, then click back in the Genre field to reopen the Genre window.

- Click on the x beside the name on the tag you want to remove.

The genre is removed from the Select Tag(s) field.

- Click Apply Genre again.
The genre is removed from the Keywords Tab.

- Click Save Changes.
The genre is removed from the track.
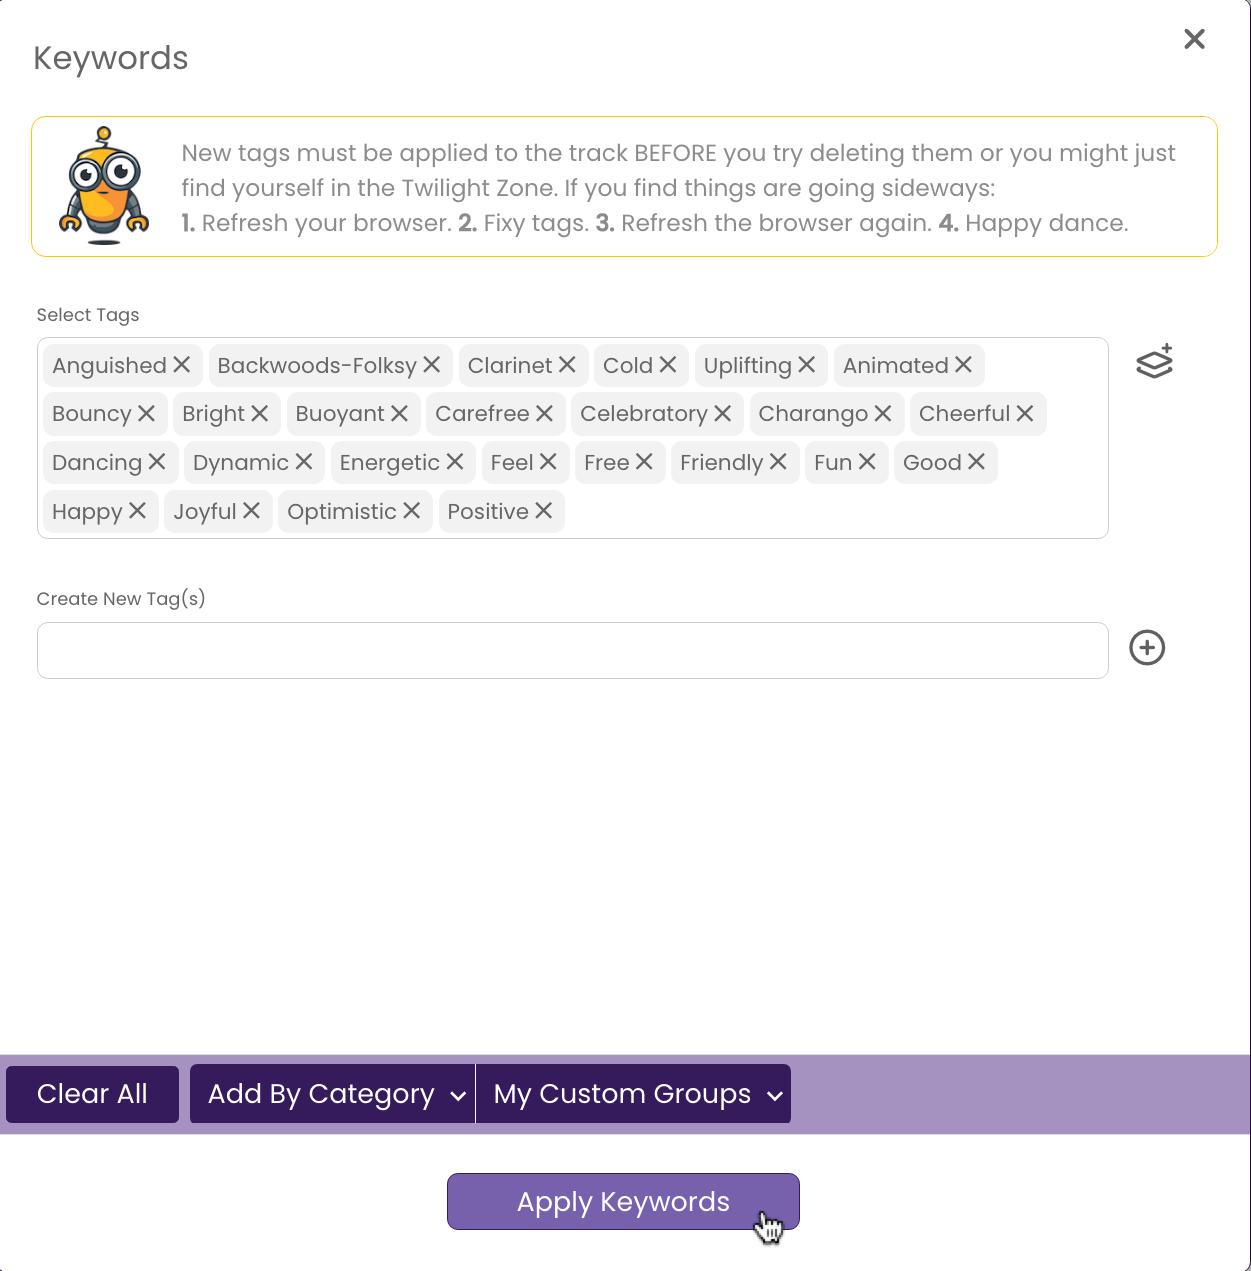
Keywords and Featured Instruments
The Keywords and Featured Instruments offers a categorized library of hundreds of descriptive terms to select from. Or you can add your own.
Add Keywords Using the Select Tags Field
- Click in the Select Tags field.
Scroll through the list and check the boxes next to the keywords you want to choose.
You can also type your term into the Select Tags field to jump directly to available options containing your entered text.

- Click Select.
The keywords are added to the Select Tags field.
- Click Apply Keywords.
The keywords are added to the track.
Add Keywords With the Category Selector
- Click the By Category button.
A sub-menu with four categories appears: Instruments, Atmosphere, General, and Moods.

- Click on Instruments.
The Instruments sub-menu contains over 200 instruments that are separated into alphabetical groups.

- Click on Moods.
Clicking Moods opens up a second dub-menu broken into four mood types: Anger/Intensity, Fear/Danger, Happiness/Love, and Sad/Negative. Each of these sub-groups has dozens of keywords from which to choose.
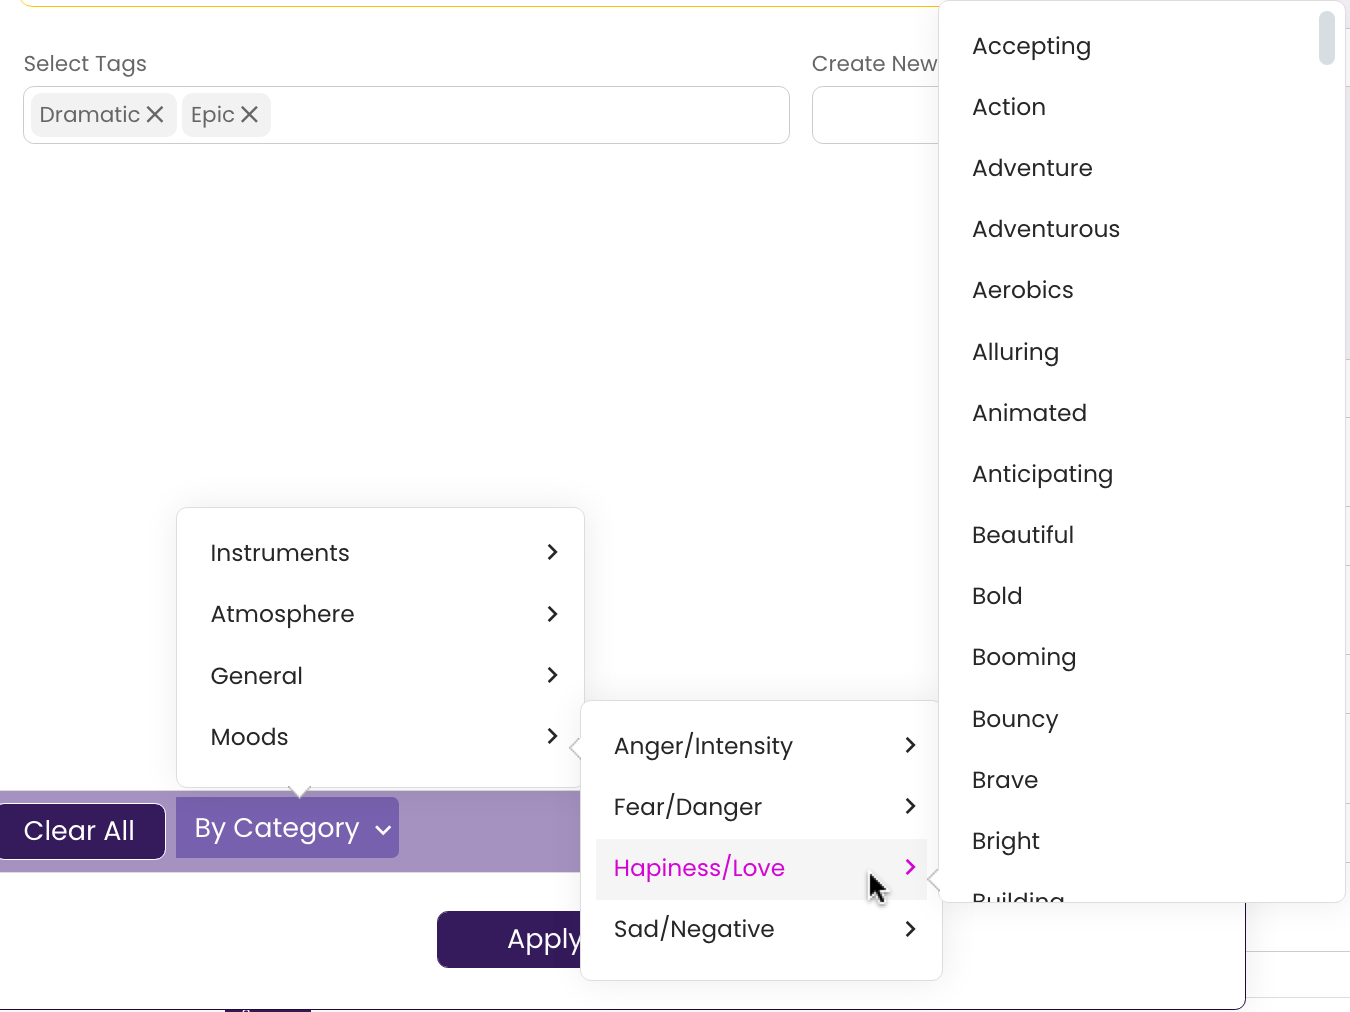
Click on the moods that apply to your track. You can click on as many as you like without having to re-open the sub-menus.
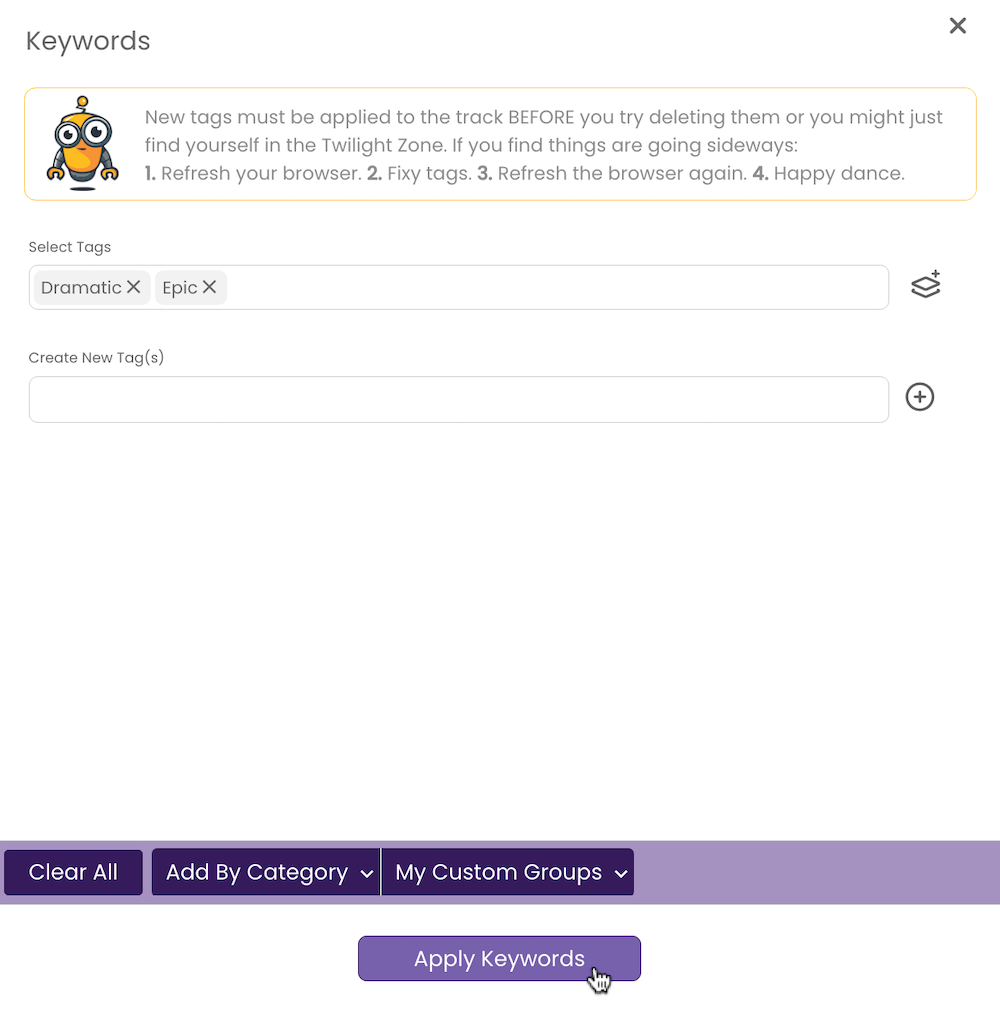
Create a New Keyword
- Click in the Create New Tag(s) field.
- Enter the new keyword and click theicon.

- Click Apply Keywords.

The new keyword is added to the track as well as to your TrackStage keyword library. Note that this new keyword will be available to future tracks through the Select Tags option but NOT the By Category selector.
Remove a Single Keyword from the Track
- Make sure the keyword is already applied to the track.
Click on Apply Keywords, then click once again in the Keywords and Featured Instruments field to reopen the Keywords window.
- Click on the x beside the name on the tag you want to remove.

- Click Apply Keywords.
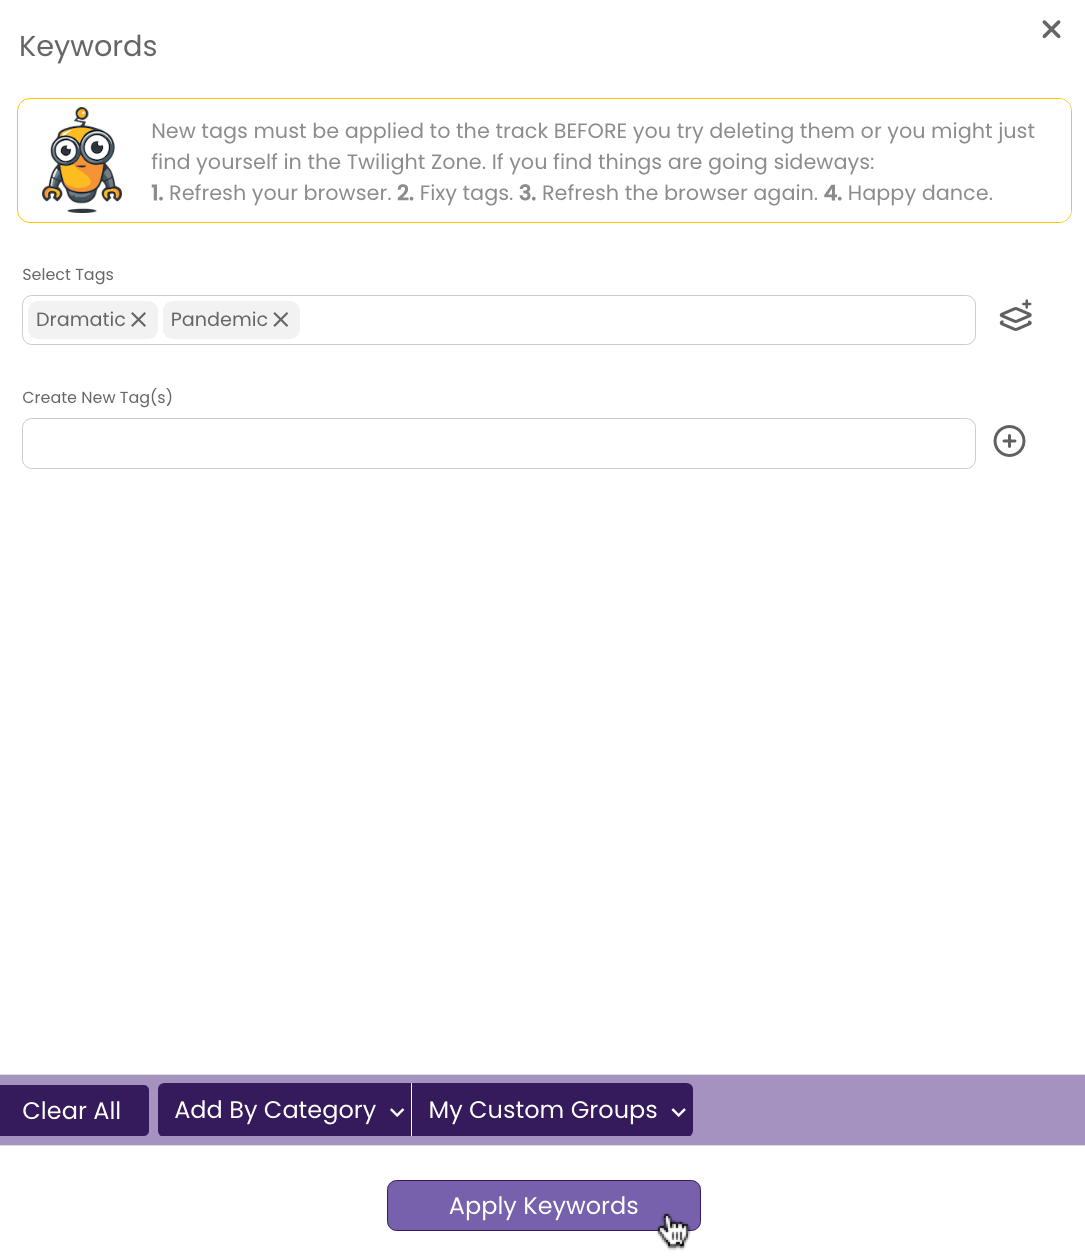
The keyword is removed.
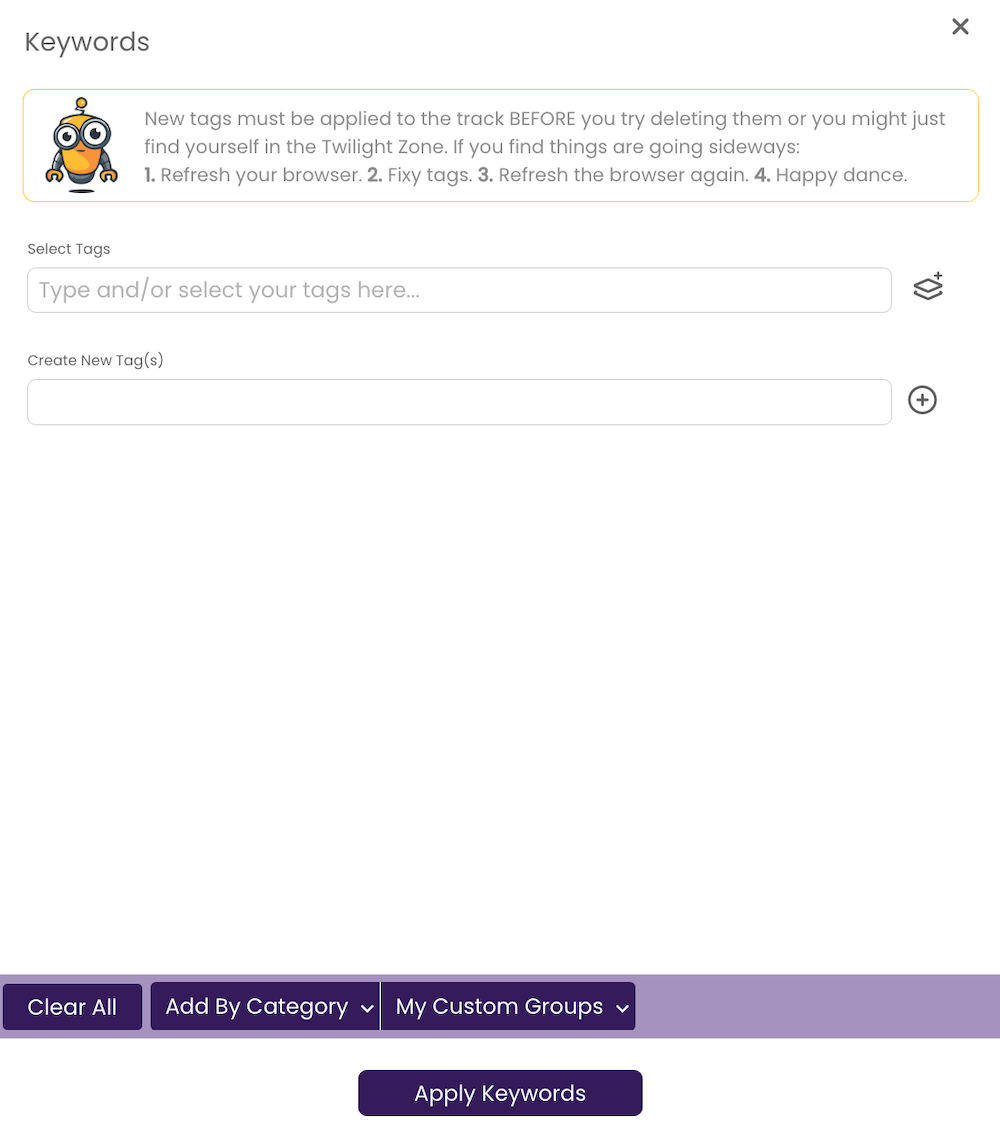
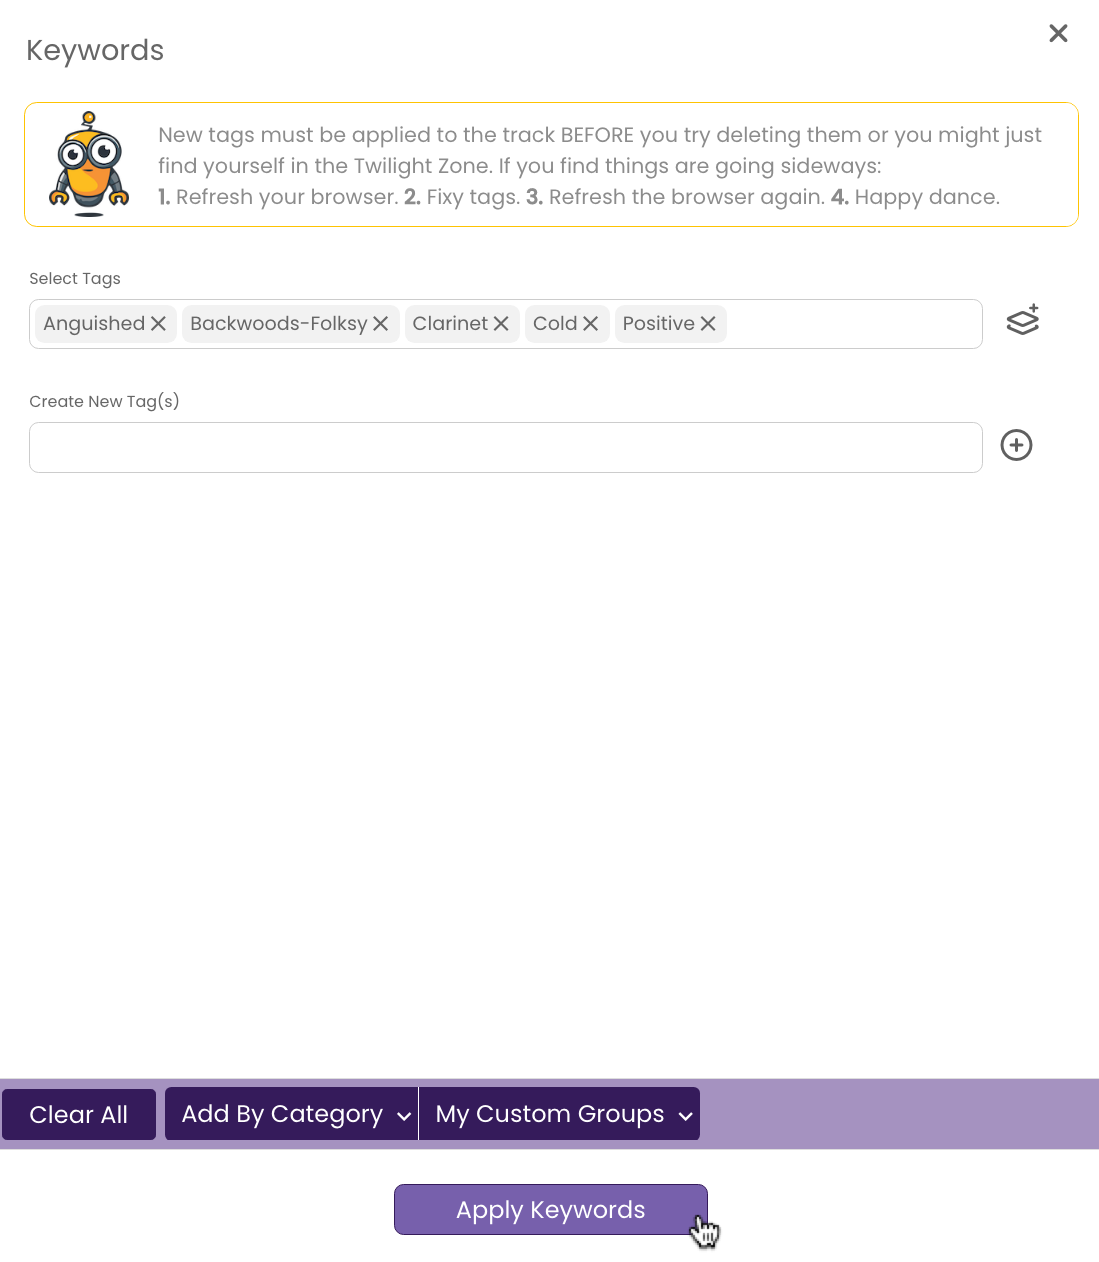
Remove All Keywords from the Track
- Click in the Keywords and Featured Instruments field.
The Keywords window opens.
- Click on Clear All.
The tags are removed from the Select Tags field.

- Click Apply Keywords.
The keywords are removed.
Adding Keywords using Copy & Paste.
You can copy keywords from a spreadsheet or other document and paste them into TrackStage instead of selecting them individually.
- Copy the keywords from your document.

- Click in the Keywords and Featured Instruments field.
The Keywords window opens. - Click in Create New Tag(s), paste your keywords, and click theicon.

It doesn’t matter if the tags you are pasting in are already in the TrackStage library. They won’t be duplicated. Any new tags that you are pasting in, however, will be added to your TrackStage keyword library for future use. - Click Apply Keywords.
The keywords are added to your track.

Sounds Like
Use the Sounds Like field to enter any popular artists or movies that your song sounds like to aid in clients searching. (i.e. Smashing Pumpkins, Harry Potter). Data entered here will be tagged to your audio files in the Lyrics field.
Why the Lyrics field?
The description field on audio files is limited to 254 characters, but the Lyrics field is virtually unlimited, while still being fully accessible by search algorithms. TrackStage copies all keywords, genres, description and other critical fields to the Lyrics field after any song Lyrics tagged to the file.

Cue Type
Is your track a trailer? A bed? A stinger? An underscore? Entering a cue type in this field will add it to your track’s metadata, making your track easier to find for clients searching by cue type.

Production Type
You can further tag your song as being appropriate for certain production types, such as Advertising, Games, Film/TV, etc. Again, this information will be added to your track’s metadata and will be searchable.

Ideal For...
Is your game track ideal for kids’ games? Is your anthemic song ideal for a sporting event? You get the picture…

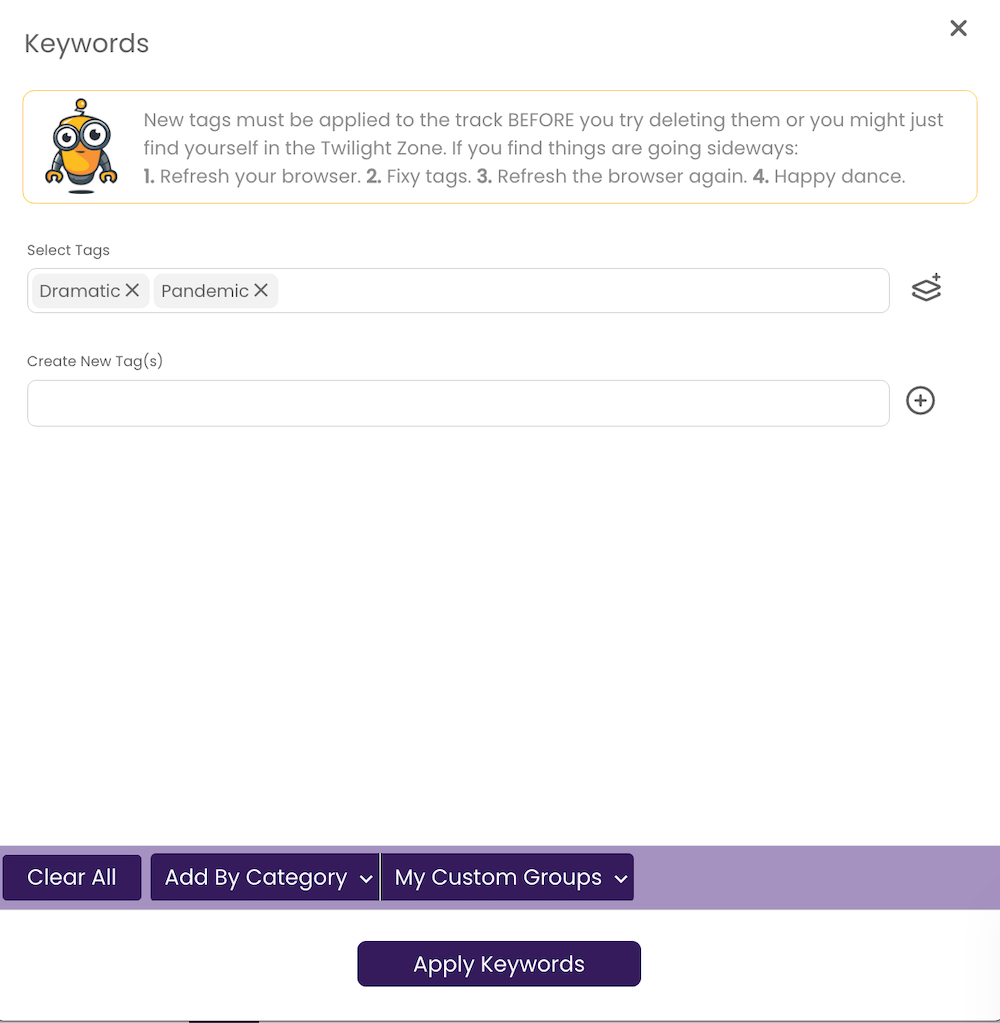
Custom Keyword Groups
If you tend to write songs with similar moods, themes, etc., then it can save you a lot of time and energy to create a custom group of keywords.
Creating a Custom Keyword Group
- In the KEYWORDS Tab, click in the Keywords field.
The Keywords window opens.
- Add tags as desired.

- Click the icon next to the keywords field.
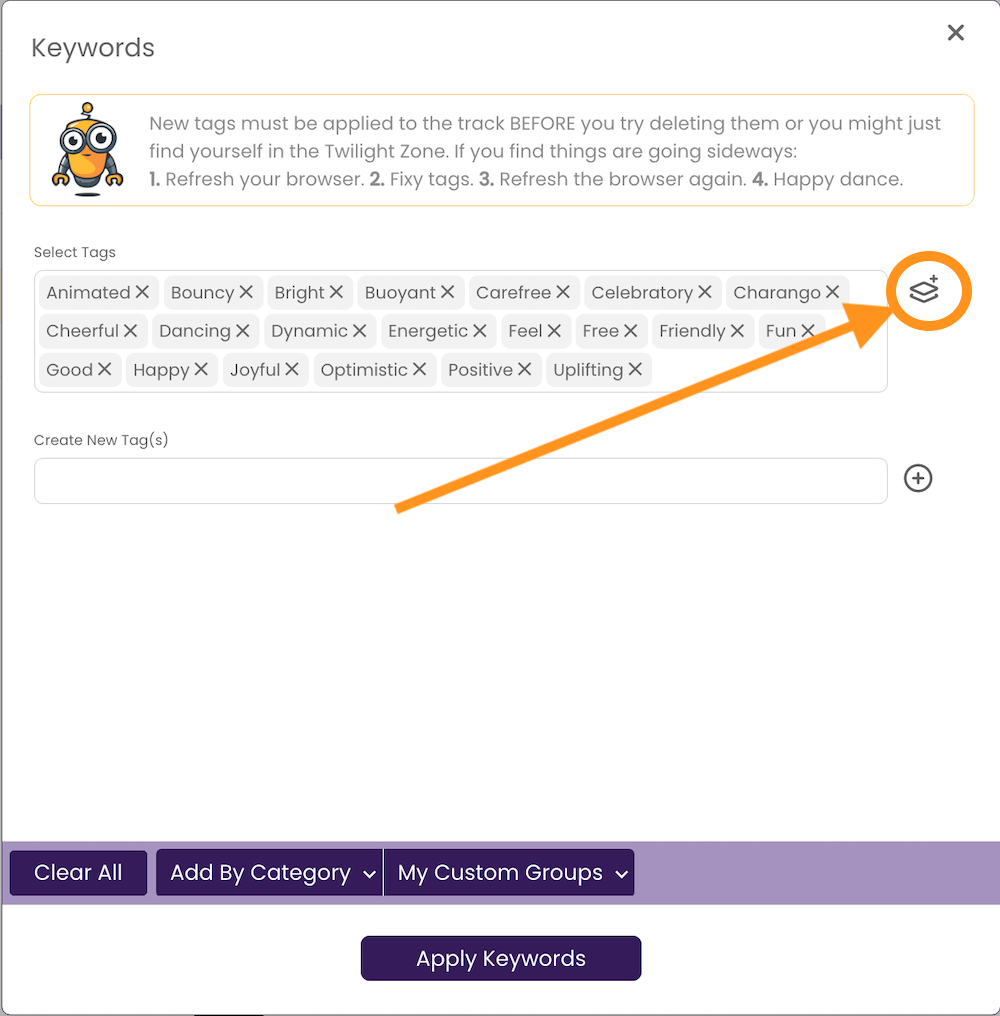
A dialog opens. - Create a name for the Group and click Ok.
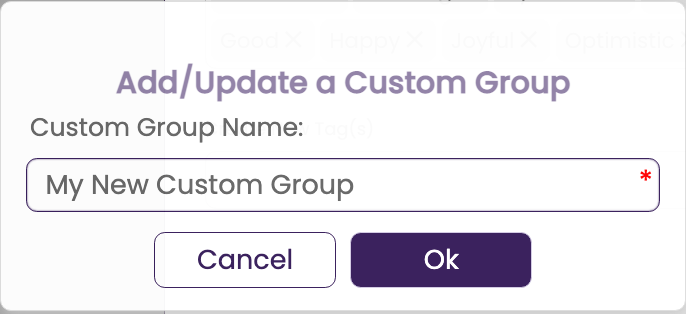
The group will now appear under My Custom Groups in the Keywords window for you to insert into other songs.
Using a Custom Keyword Group
- Click in the Keywords field.
The Keywords window opens.

- Click My Custom Groups.
Select Insert Group
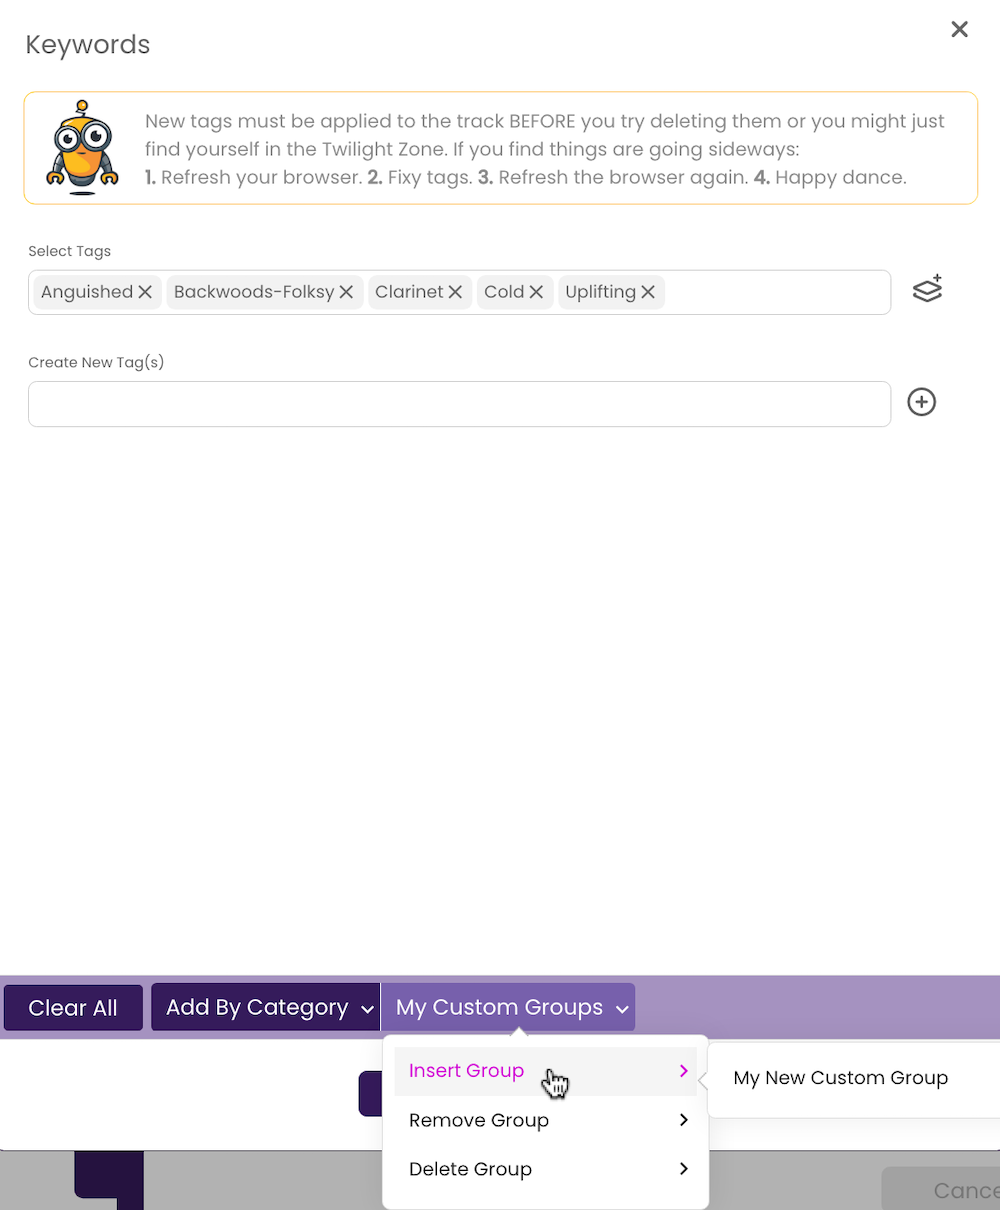
- Select the Custom Group you want to use.
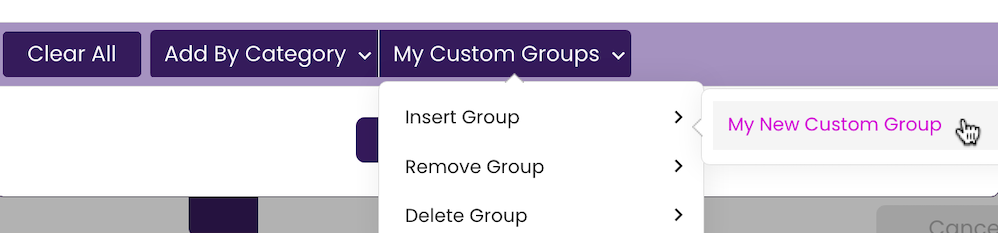
The Custom Group is added to the keywords field.
- Click Apply Keywords.
The keywords are saved to your track.
Removing a Custom Keyword Group
If you added a Custom Group in error, it’s easy to back it out of the keywords field.- Click My Custom Groups.
Select Remove Group
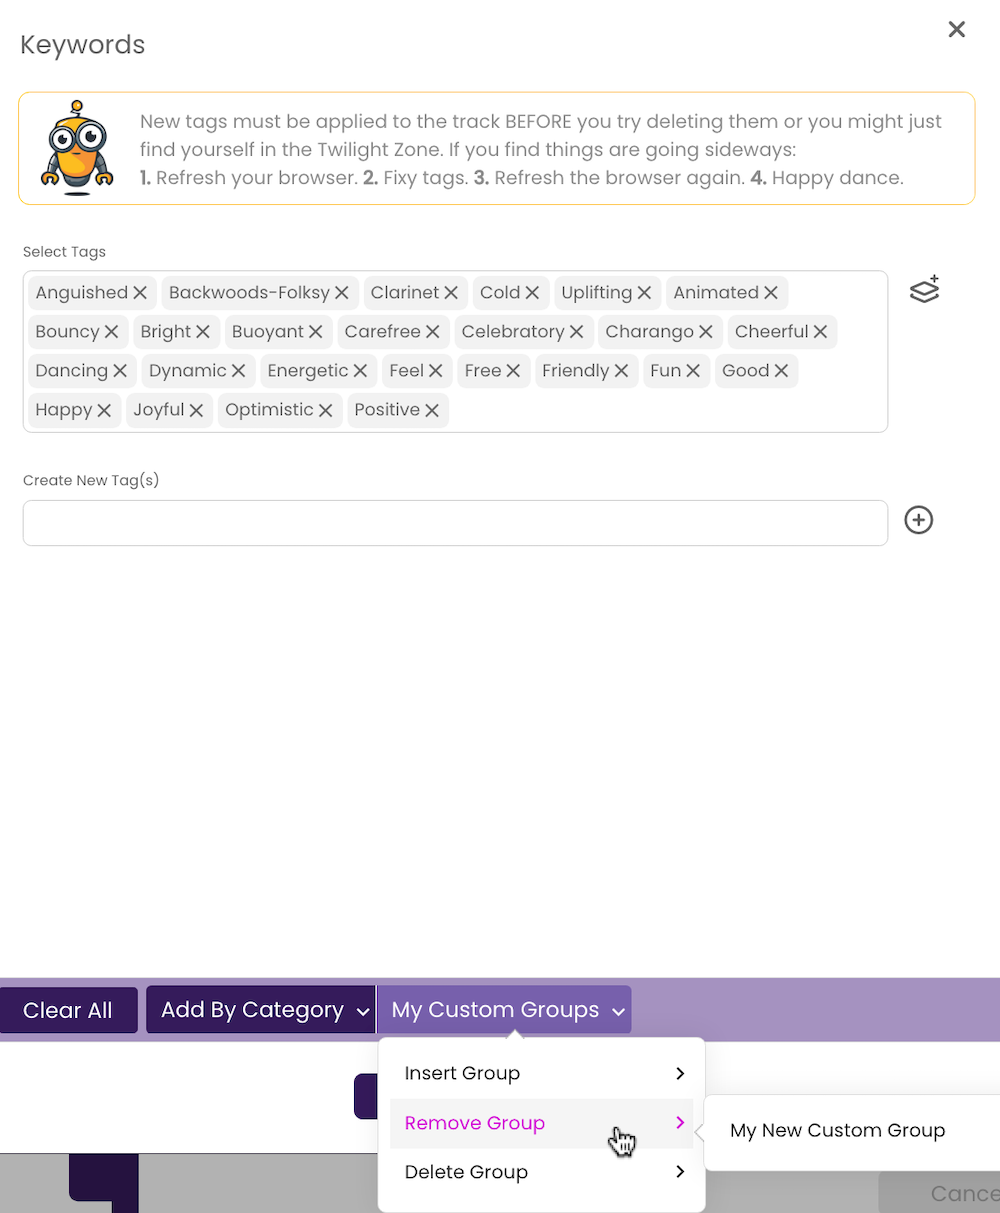
- Select the Custom Group you want to remove.

The Custom Group is removed from the keywords field. - Click Apply Keywords.
The changes are saved to your track.
Deleting a Custom Keyword Group
If you no longer want a particular Custom Group, you can delete it easily.- Click My Custom Groups.
Select Delete Group.

- Select the Custom Group you want to delete.
The Custom Group is deleted from the system.