CREATIVE Projects
The real power of the CREATIVE module is in the task management within individual projects.
Working with Projects
Add a Project
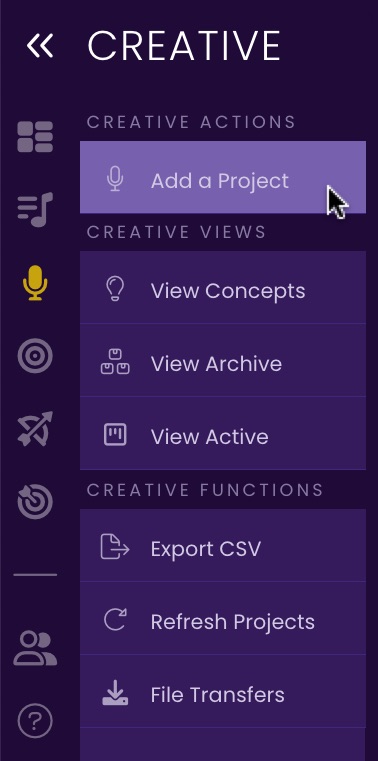
- Click on Add a Project.
Make sure the Side Menu is expanded and click on the Add a Project button.
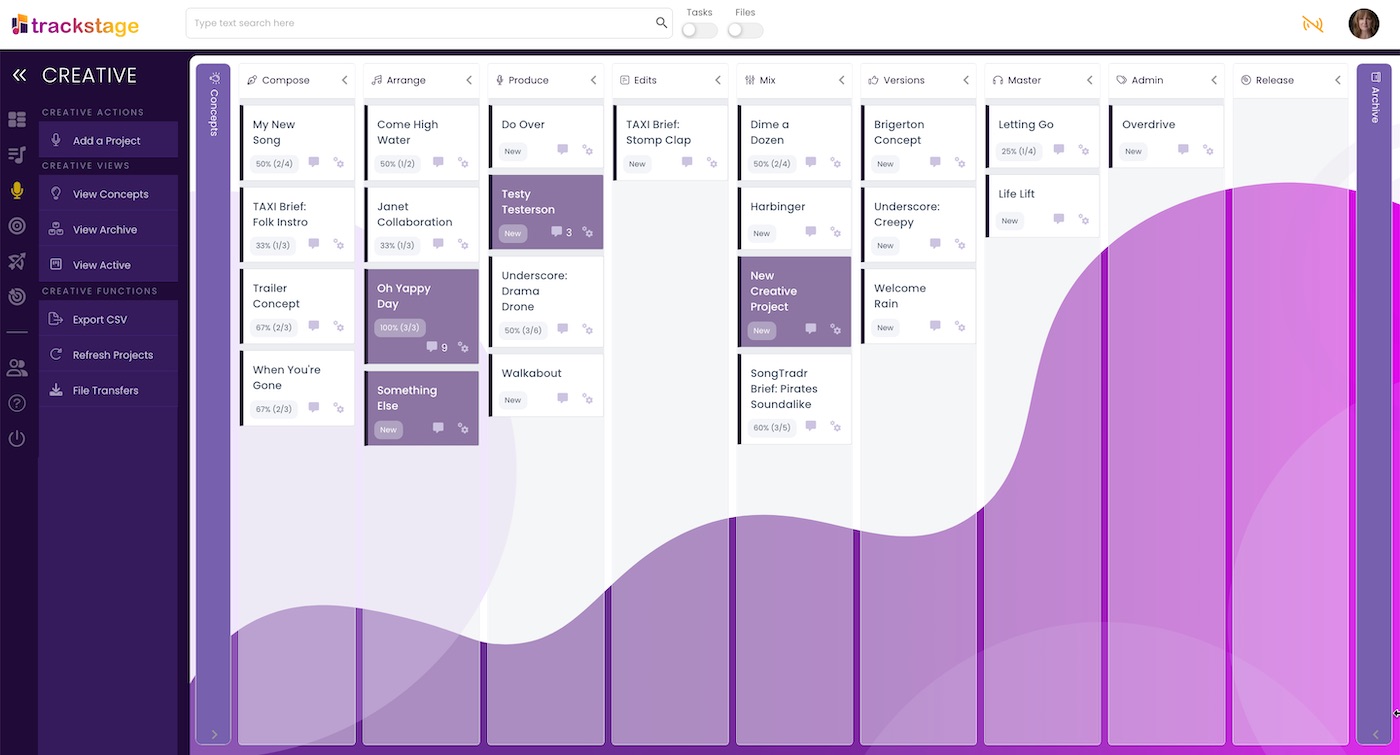
The new project will be created in the Concepts stage... because that's where everything starts. :-) New Projects are added at the top of the Concepts column. Once the browser has been refreshed, however, the Projects in the Concepts column will be arranged alphabetically. - Expand the Concepts column.
Click anywhere in the Concepts column to expand it.
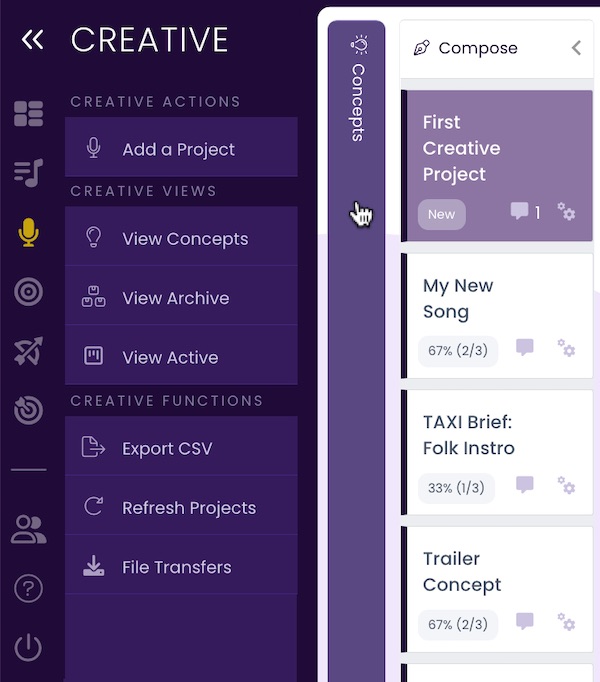
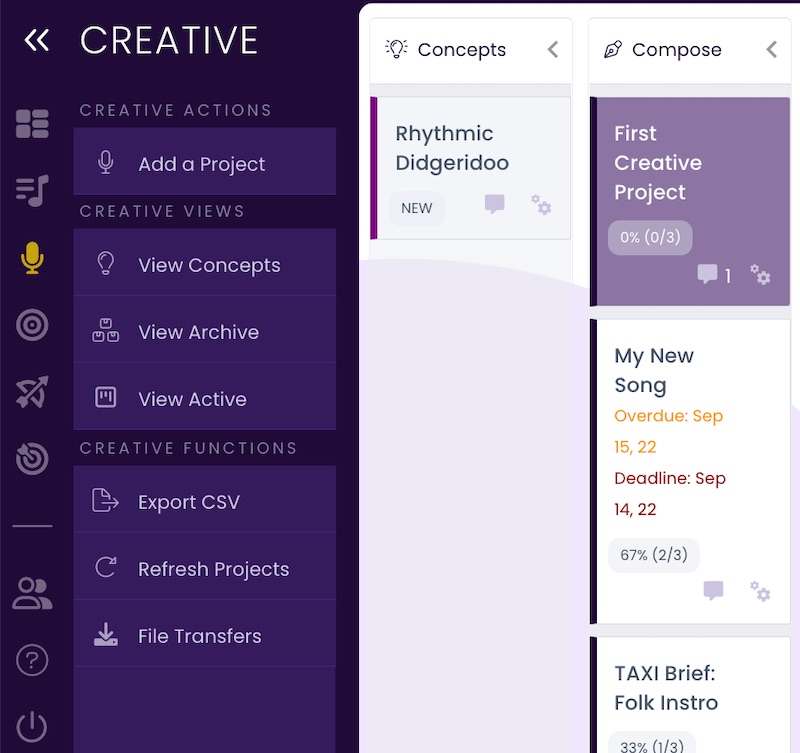
The new project will show up with the title New Creative Project.
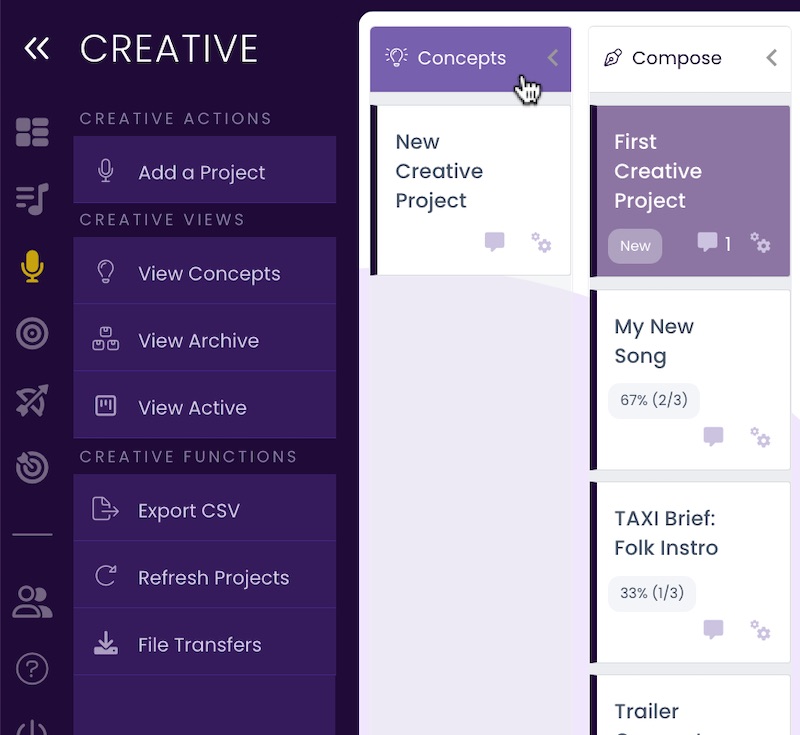
- Open the new project.
Double-click on the project card to open the Project Window.
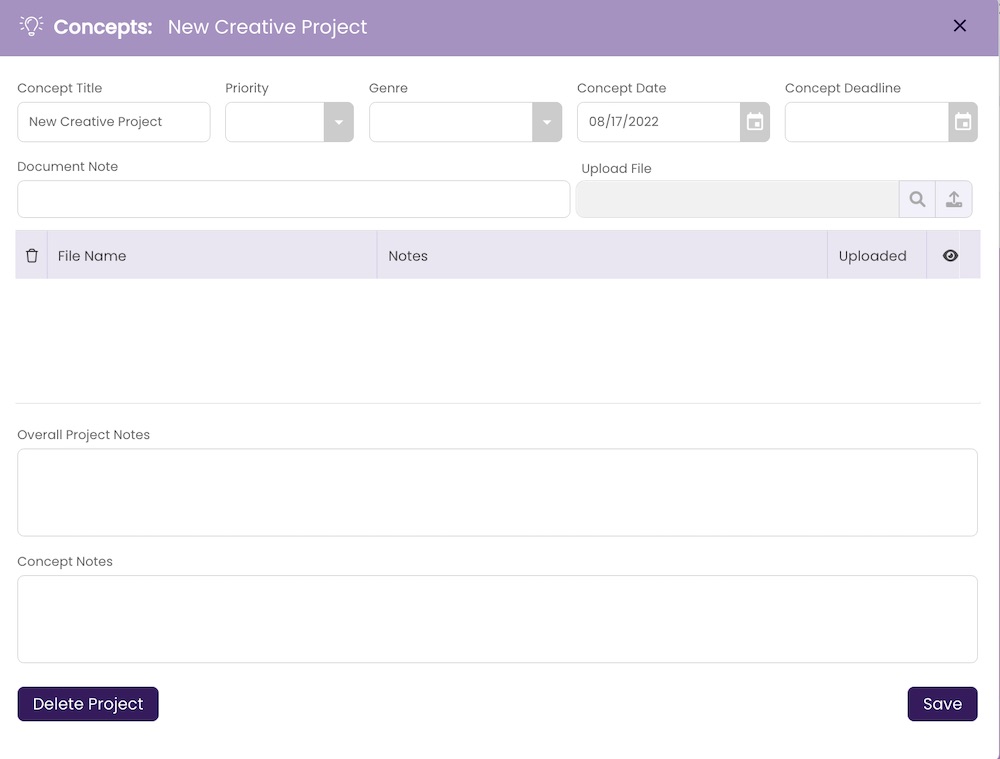
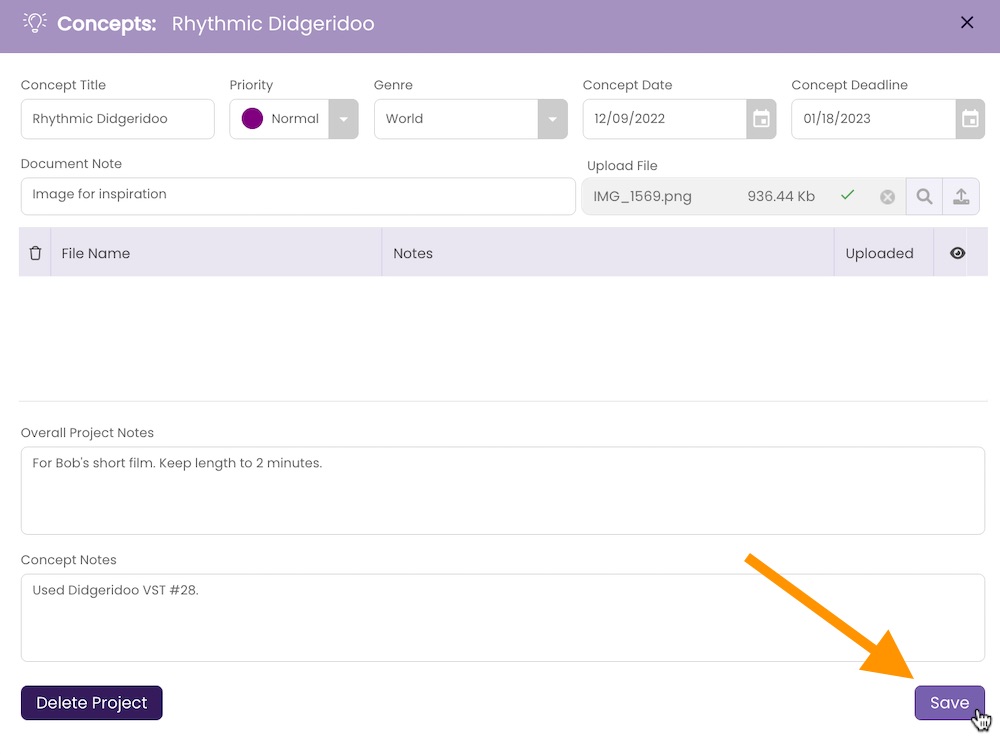
The Project Window opens. - Enter a name in the Concept Title field.
This doesn't have to be the final name of the track. You can always change it later. But you'll want to make sure you give it a name that will at least give a sense of the sound of the concept. (Ex: Jazz Underscore)

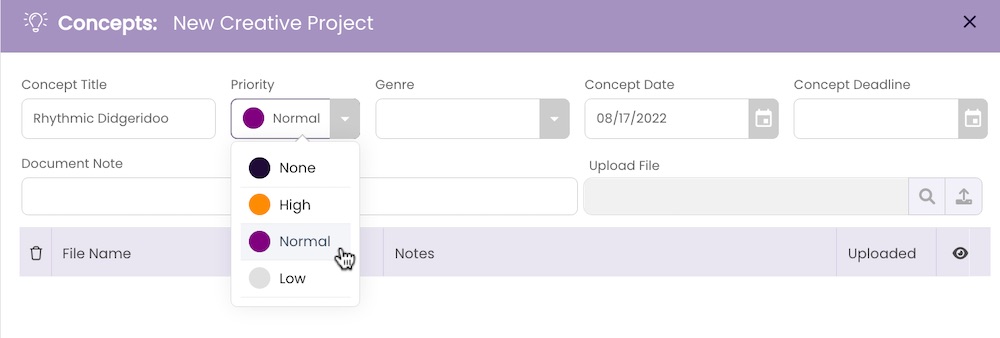
- Select a priority in the Priority dropdown (optional).
If you want to assign a priority or a color code to this track, use the Priority dropdown menu.
- Add Genre(s), mood or other keywords that will make this project relevant to you (optional).

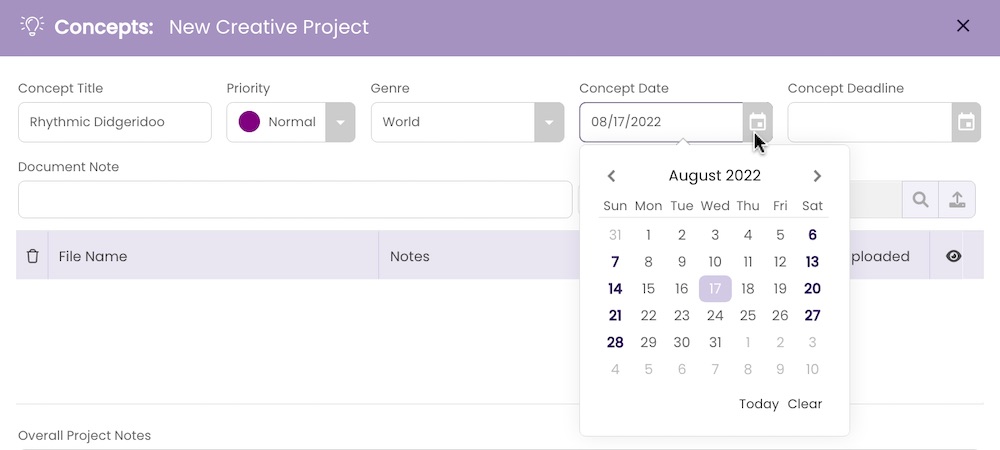
- Edit the Concept Date, if desired.
This will default to the date you created the Project in TrackStage, but is editable.
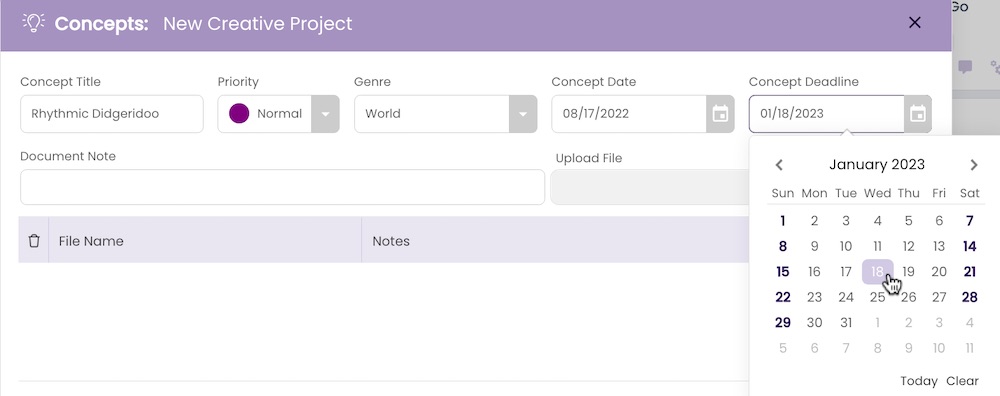
- Add a deadline (optional).
If you are writing this track to a brief or project with a deadline, enter it here to help you stay on track. Otherwise, you can leave this blank.
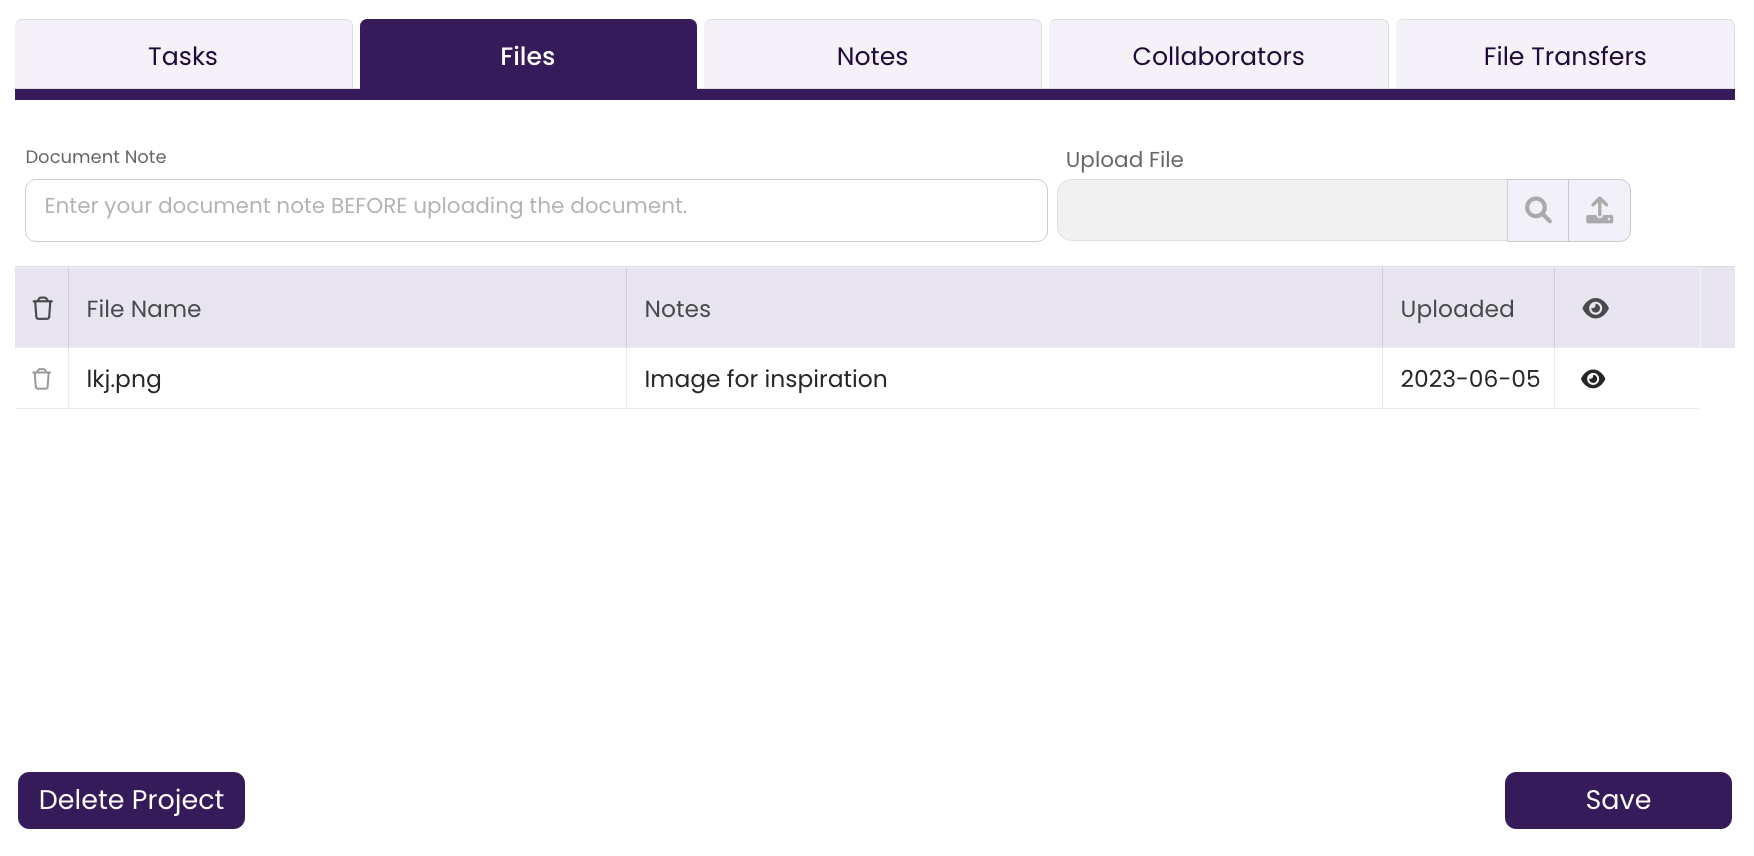
- Attach document(s) or file(s) to the Project.
Whether it's production notes, a snippet of audio, or an image for inspiration, you can add files directly to your Project to be able to refer to at any point in the development process.
- Add a descriptive note about the file (optional).
This can only be done BEFORE you select the file.

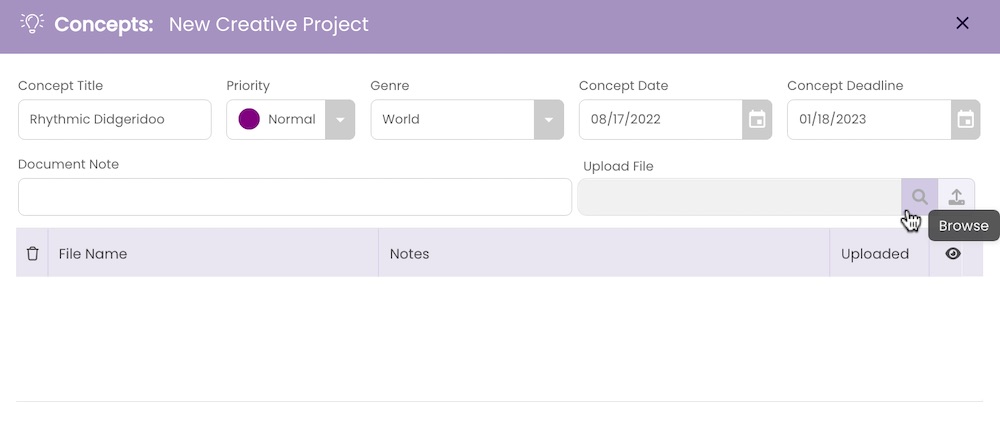
- Select the file.
Click on the and navigate to the file you want on your computer.
- Click Open.
The file is uploaded to the Project.
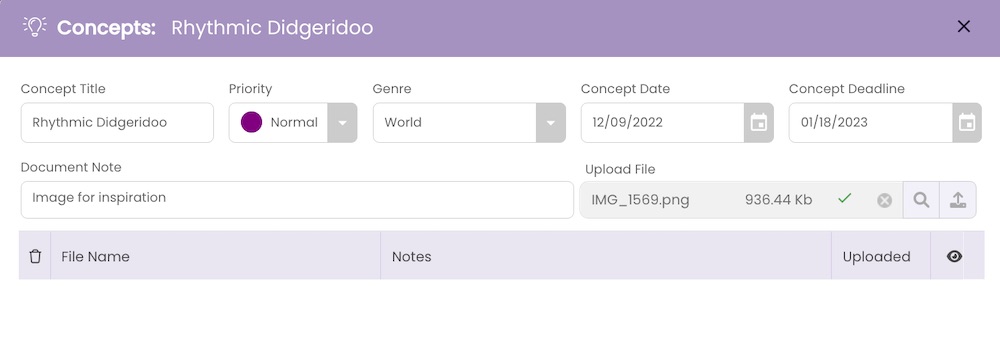
- Add a descriptive note about the file (optional).
- Add Project Notes (optional).
Notes in this field will show up in the Project Window at every stage of development.

- Add Concept Notes (optional).
Notes in this field are for the Concept stage only. You will only be able to view them when your project is in the Concepts stage column.

- Click Save.
If you are writing this track to a brief or project with a deadline, enter it here to help you stay on track. Otherwise, you can leave this blank.
The Project Card is updated in the Project Board.
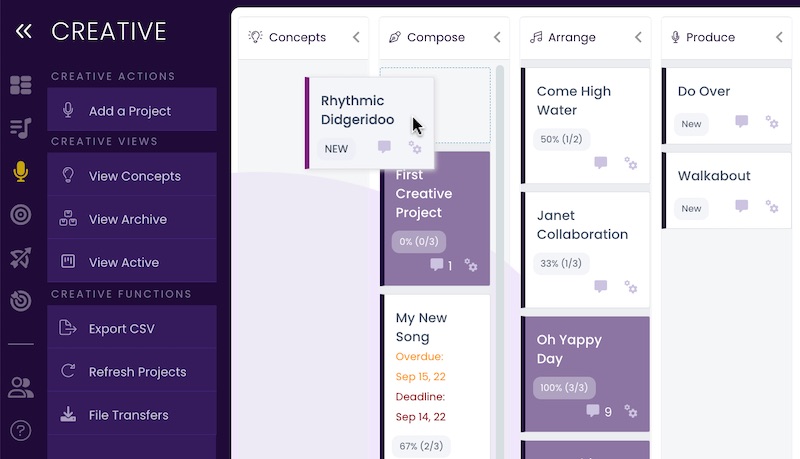
- Move the Project Card to a Development Stage.
You can elect to keep the Project in the Concepts stage if you don't plan to follow through immediately with it and just want to keep it as an inspiration to pick up on later. However, if you want to work this project now, move it to its current stage of development by dragging the Project Card to the appropriate column.
Delete a Project
There are two ways to delete a project. From the CREATIVE board, and from within the Project Window.
From the CREATIVE Board
- Click on the Project you wish to remove.

- Click the gear icon in the lower right-hand corner of the Project Card.
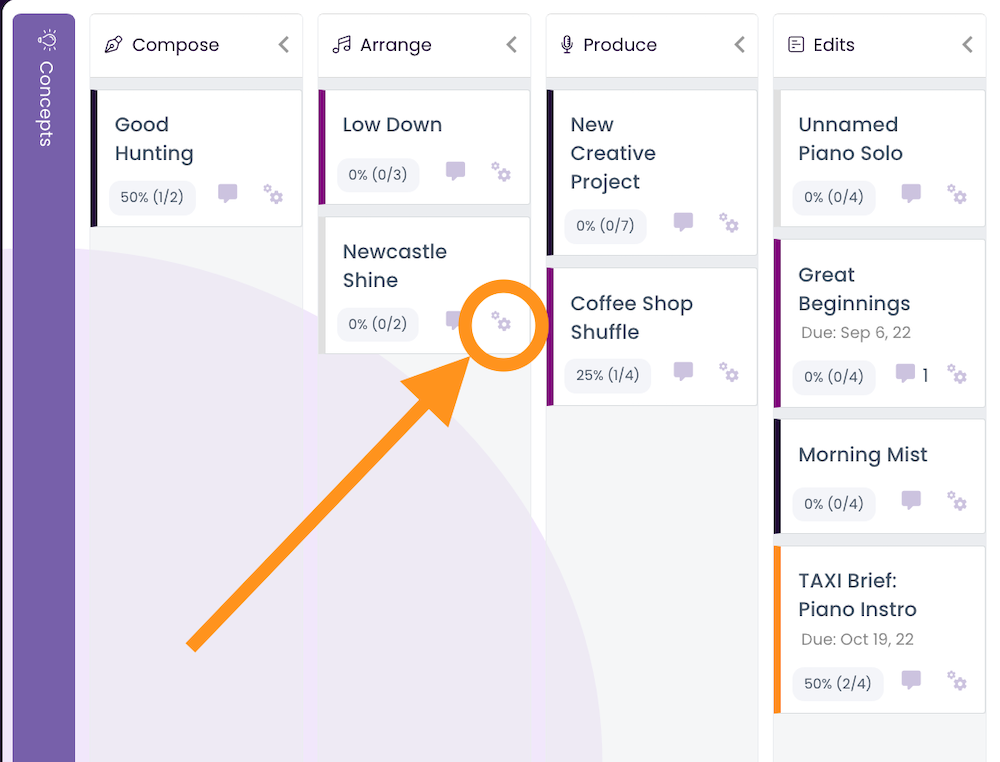
- Select Delete
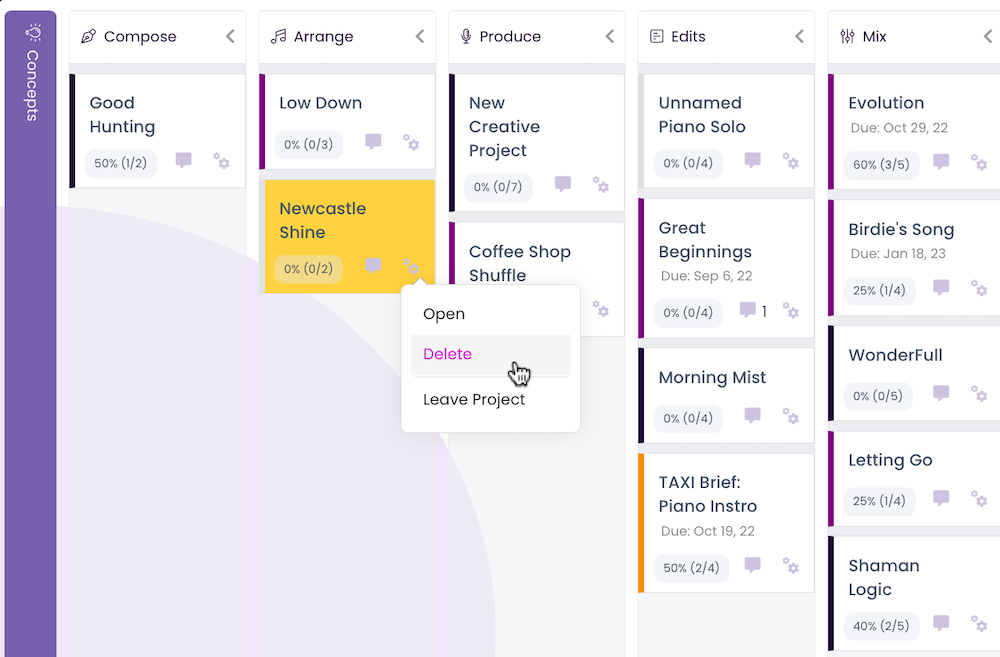
The Project is removed from the Board.
From the Project Window
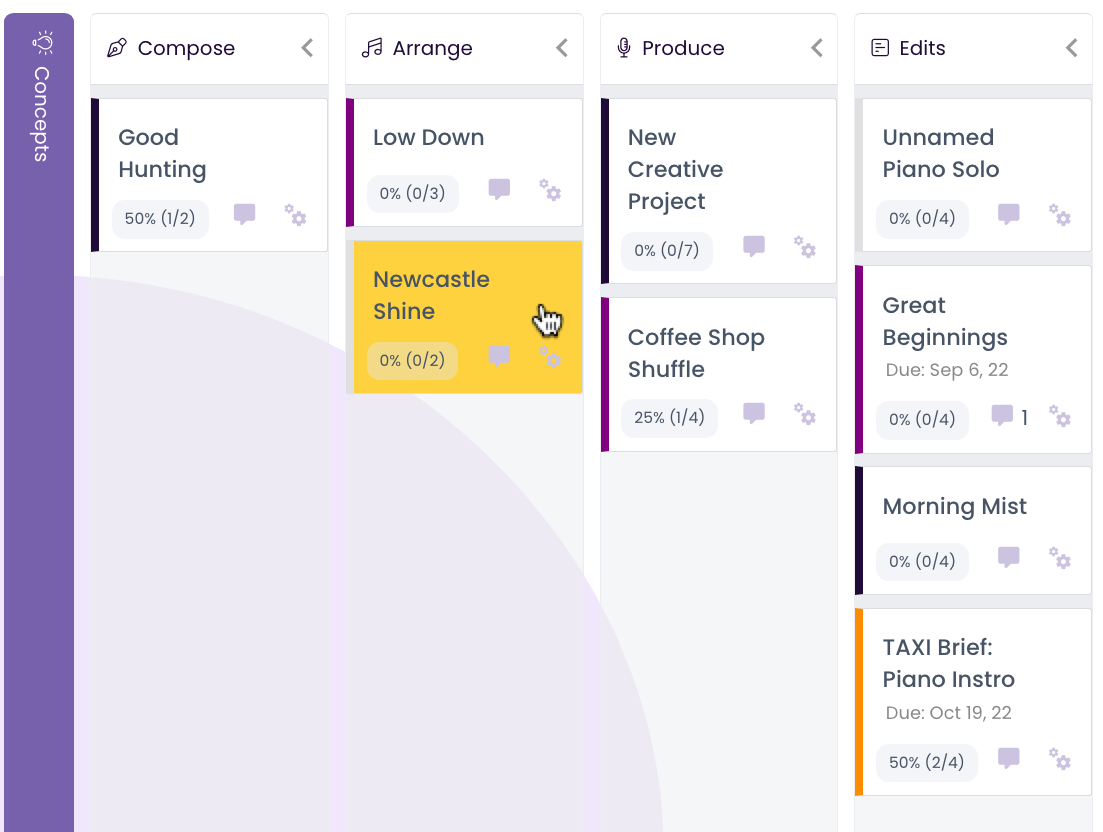
- Open the Project you wish to remove.
Double-click on the Project Card to open the Project Window.
- Click on Delete Project
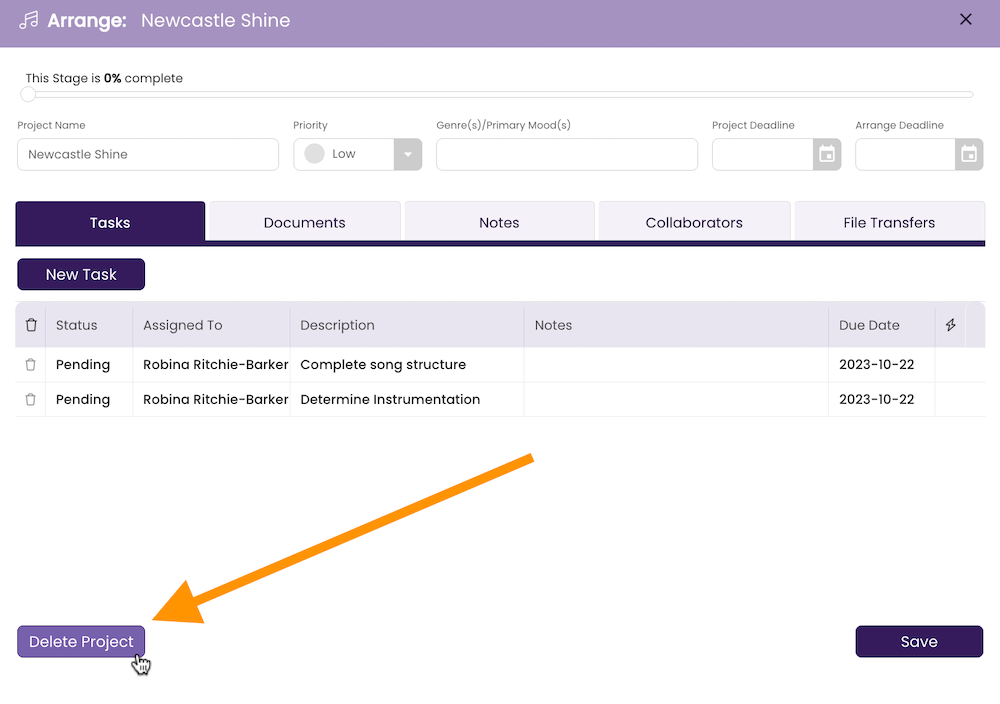
The Project is removed.
The Project Window
The Project Window offers numerous features while it is in any of the active stages of development (Compose > Release).
- Completion Status Bar
The status bar at the top of the Project Window shows the progress toward completion for the current stage based on a percentage of how many tasks are complete out of all active tasks. See Creative Tasks.

- Info Section.
Information added in the Concepts stage when the Project was created will show up here and can be edited as needed. The Project Deadline will persist in all stages, but you can also assign a stage-specific deadline as well that will only show up when the Project Card is in the current stage.

- Tasks Tab
The Tasks Tab displays the tasks for the current stage. These tasks will change according to what stage the Project is in. Any edits to the tasks saved in the current stage will remain in place even if the Project Card is moved to another stage. Dragging the Project Card back to the current stage will show all edits and tasks in progress still in place. See Creative Tasks.

- Files Tab
The Files Tab is where any files/documents that have been attached to the Project are stored. If you added a file when you created the Concept, it will appear here. You can add more files at any point in the development process, and you can view files by clicking on the . See Creative Files & Notes.
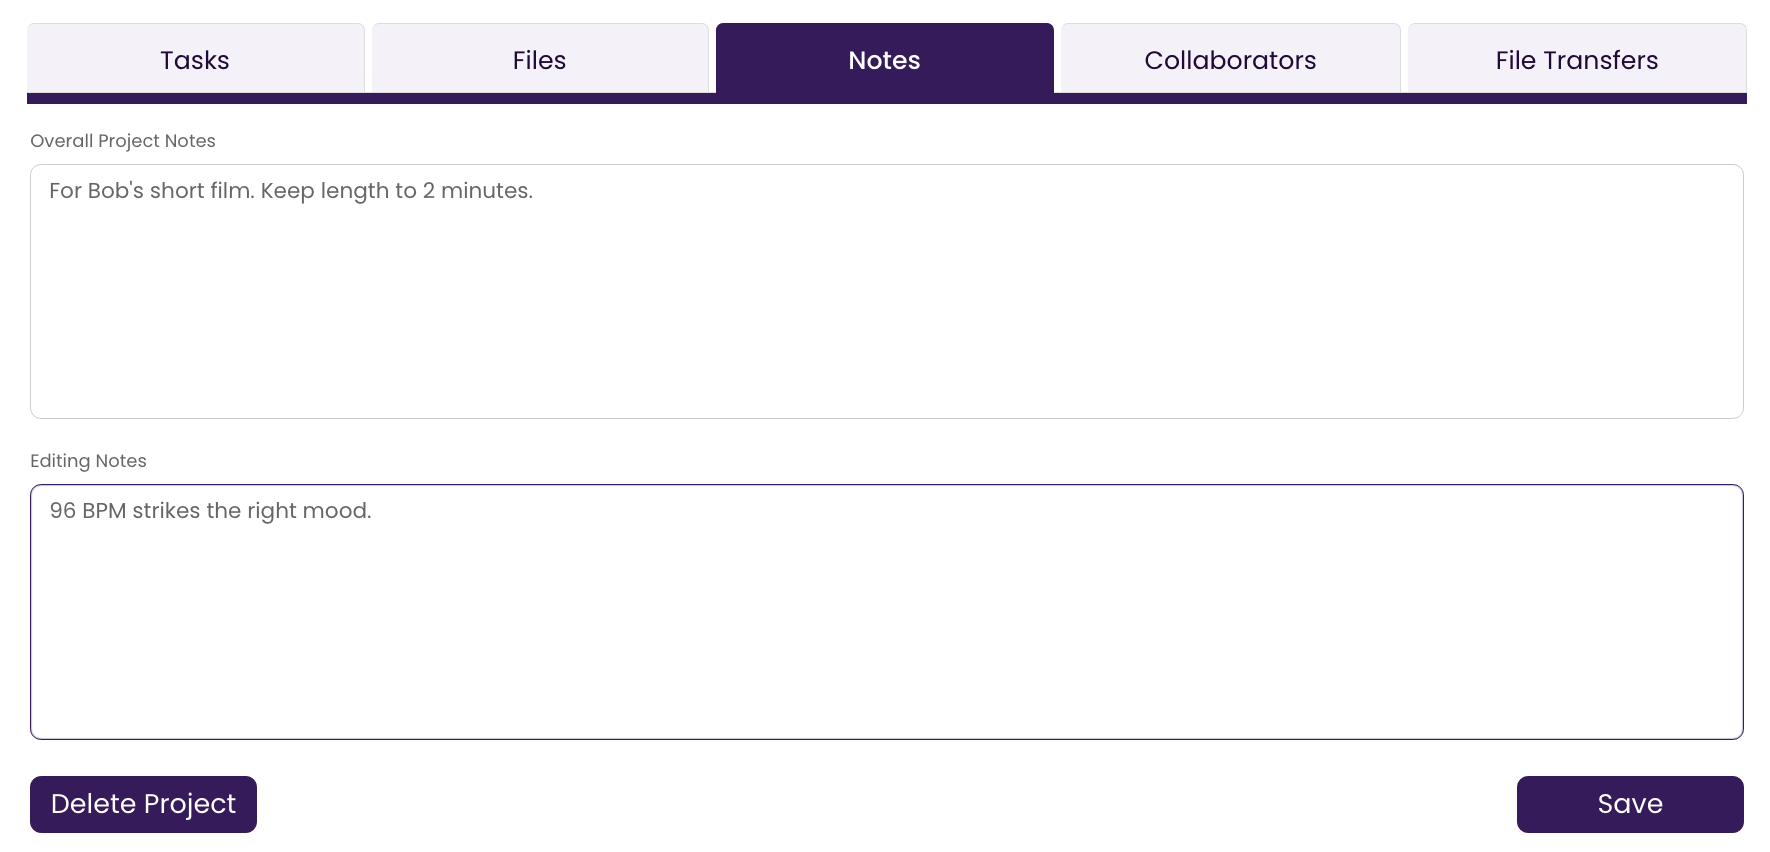
- Notes Tab
Use the Notes Tab to jot down anything relevant to the stage of development your track is currently in. Again, anything in the Project Notes field will persist throughout all stages, and anything in the stage-specific Notes field will only show up when the Project Card is in that specific stage. See Creative Files & Notes.
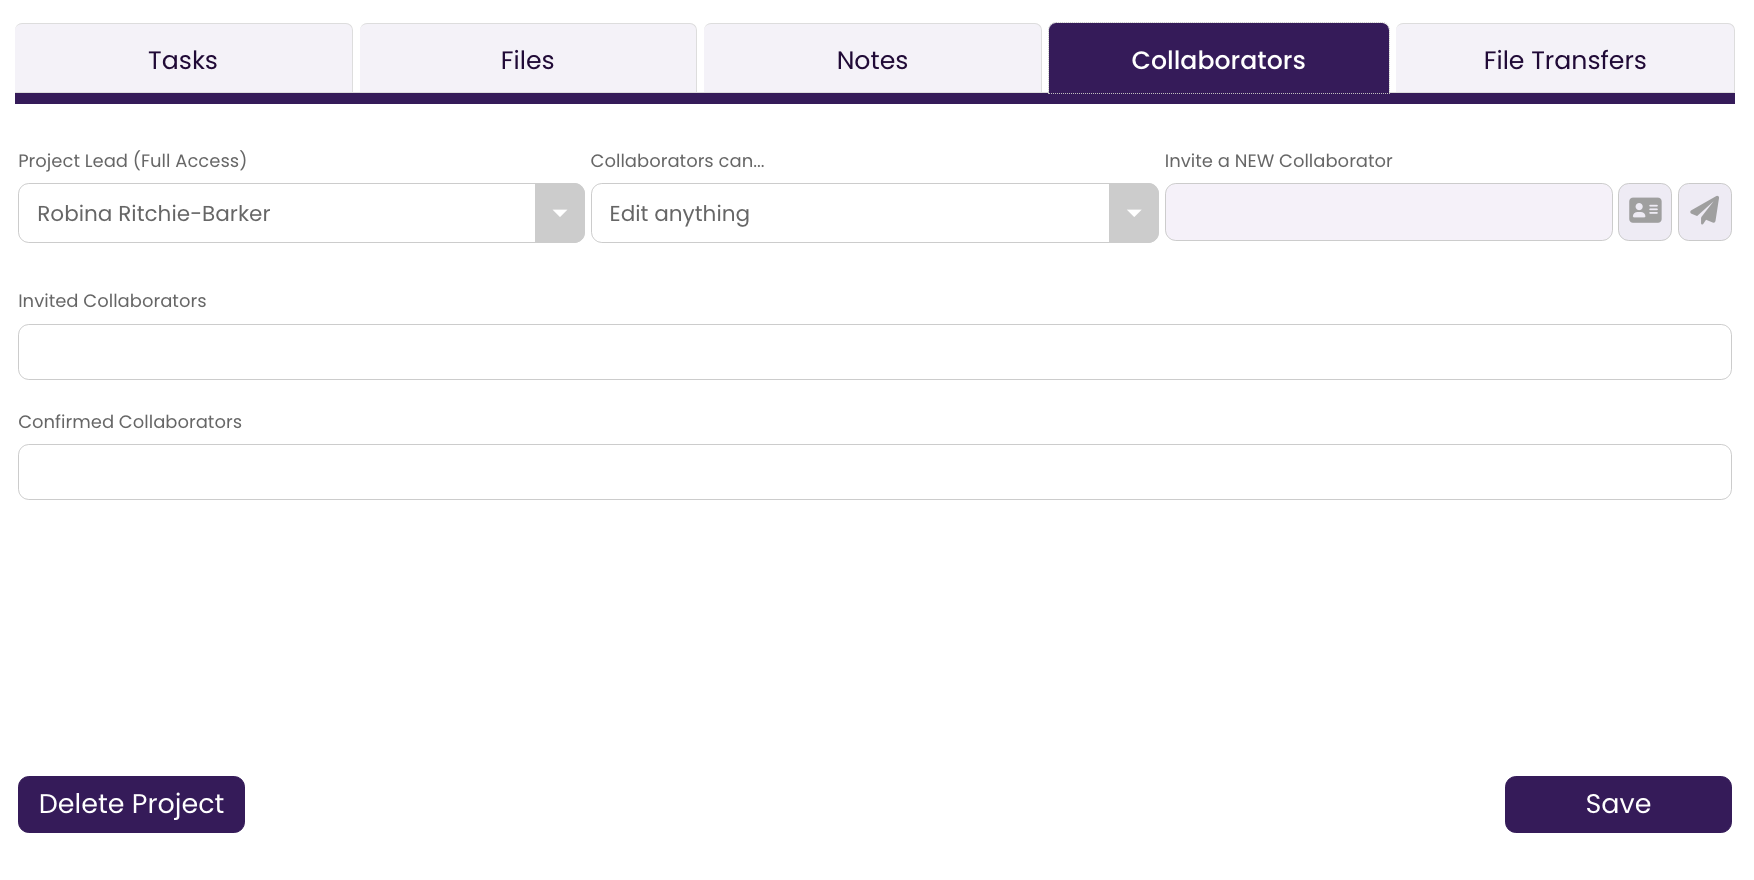
- Collaborators Tab
If you have collaborators on this track and they are also TrackStage users, then you can tap into the features that the Collaborators Tab offers. In this tab, you can invite collaborators to join your project and assign how much editing control you want to give them. Collaborators who join you will see the Project in their own CREATIVE Project Board, in purple. They'll be able to complete and update tasks in real-time and share comments and other communications with you through the TrackStage interface. See Working with Collaborators.
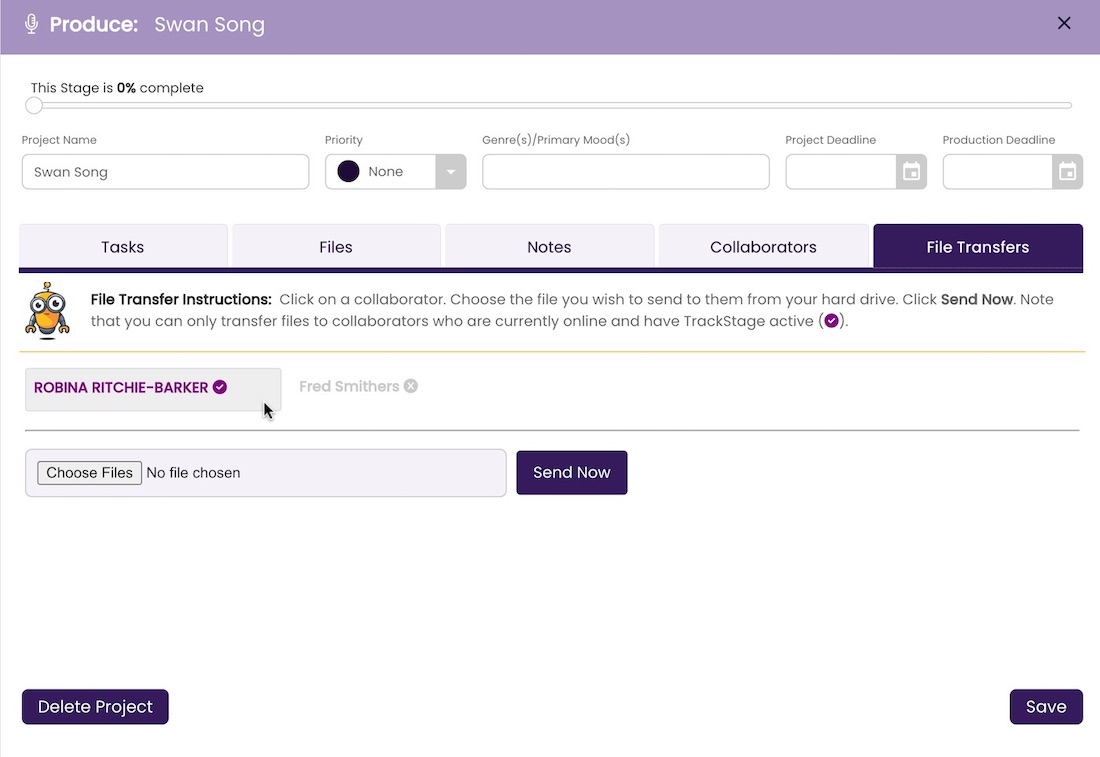
- File Transfers Tab
Use the File Transfers Tab to send files directly to your TrackStage Collaborators without having to use a third-party transfer site. Your collaborator needs to be online and on TrackStage to receive the file transfer. See Working with Collaborators
