PITCHES: Upload Tracks to a Website
If you prefer to post your playlist to a website, or send it via your own email, use this method.
Before you PITCH
First, make sure each track you are sending:- has had all its most recent metadata tagged to its audio file
- is pitchable (i.e., is not under an exclusive contract)
- has been cached to the cloud
Upload Tracks to a Website
- Make sure TrackSync is running.

- Click on the TARGET you wish to pitch to.
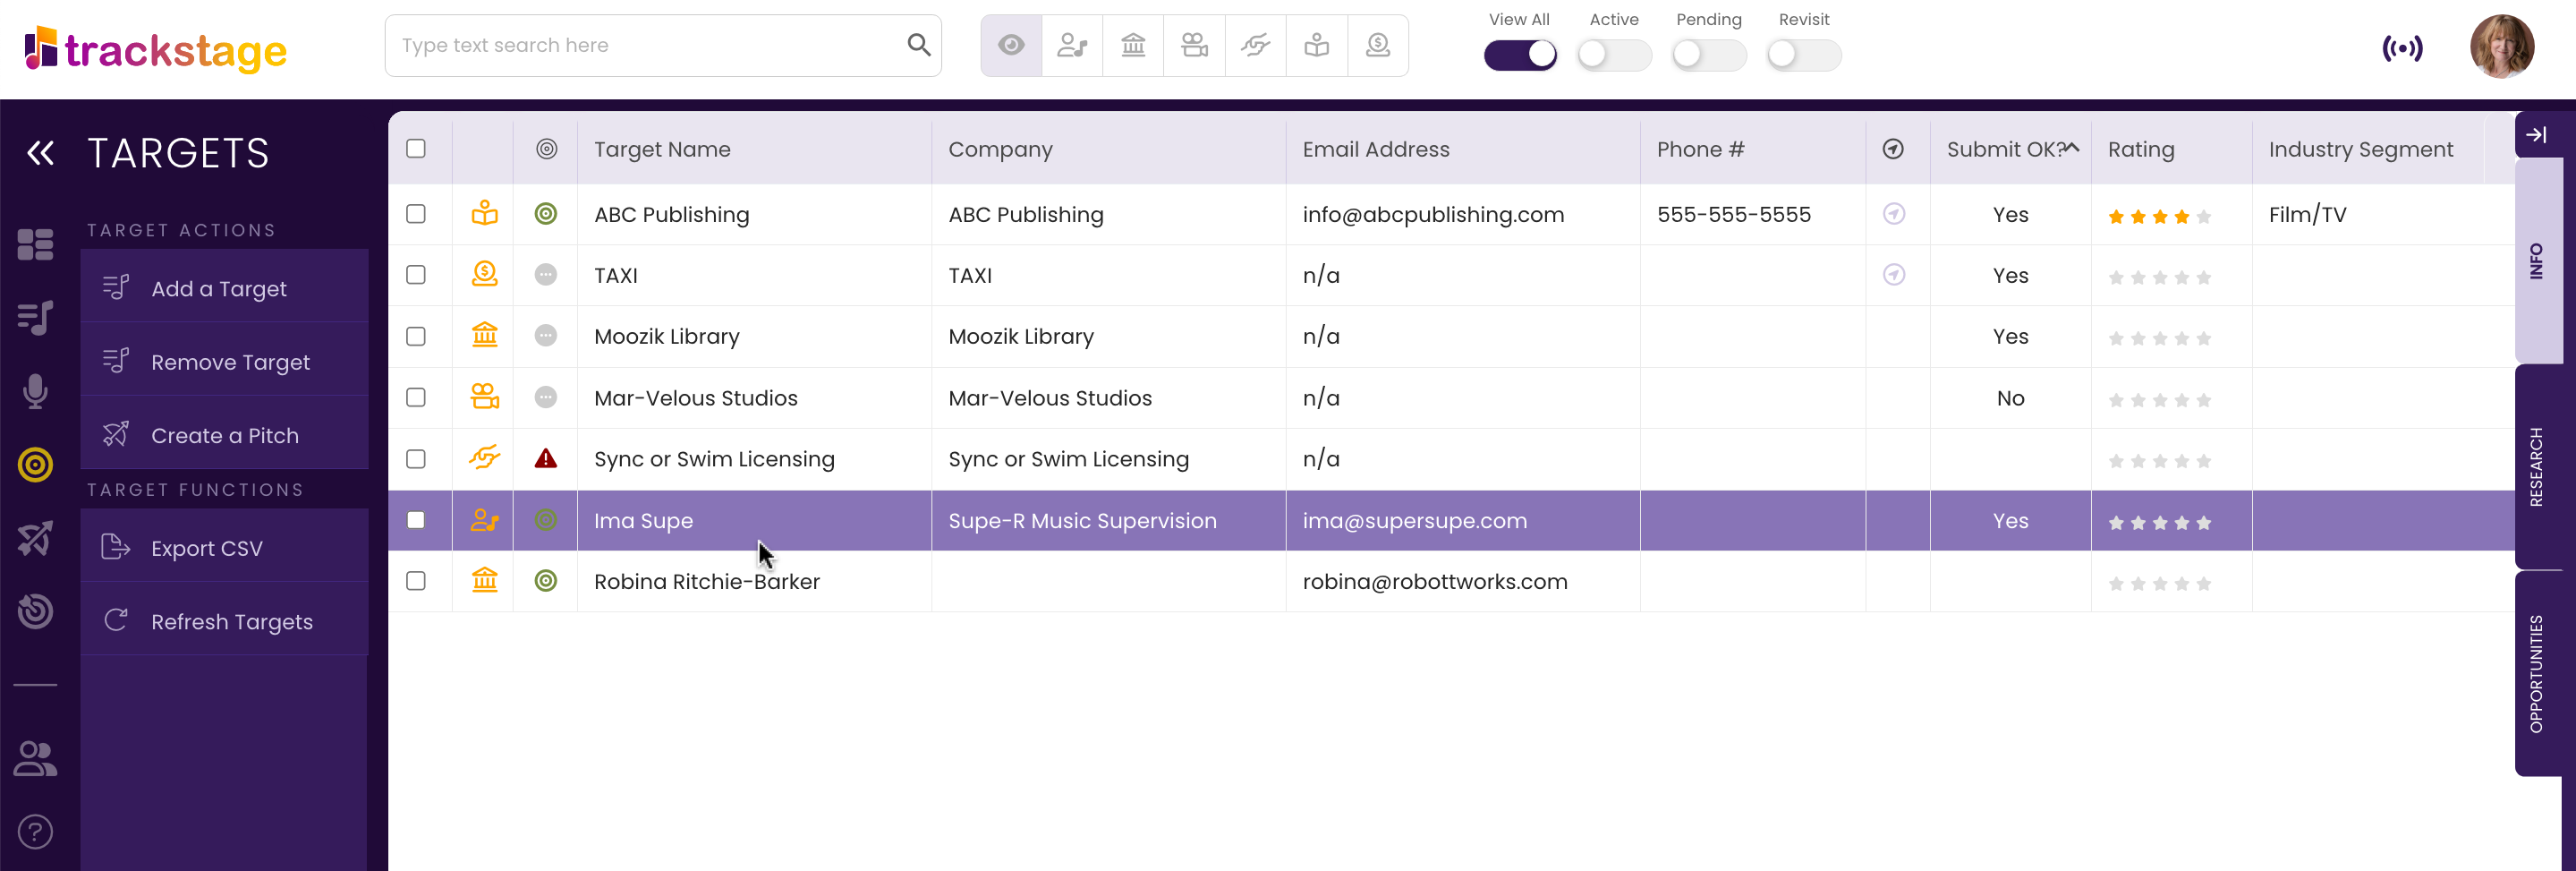
- Click the Create a Pitch button.
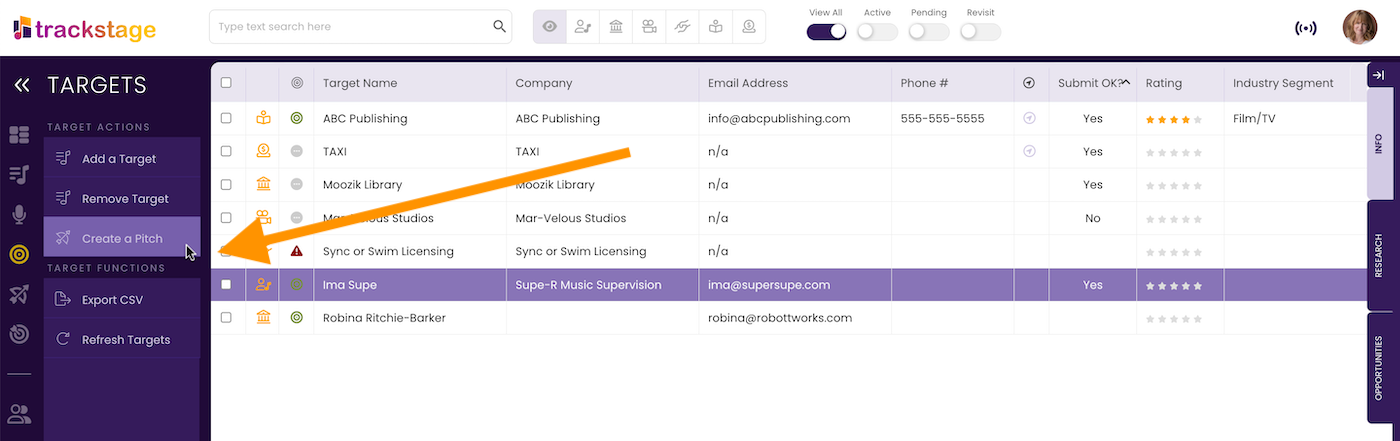
The Pitch Wizard opens.
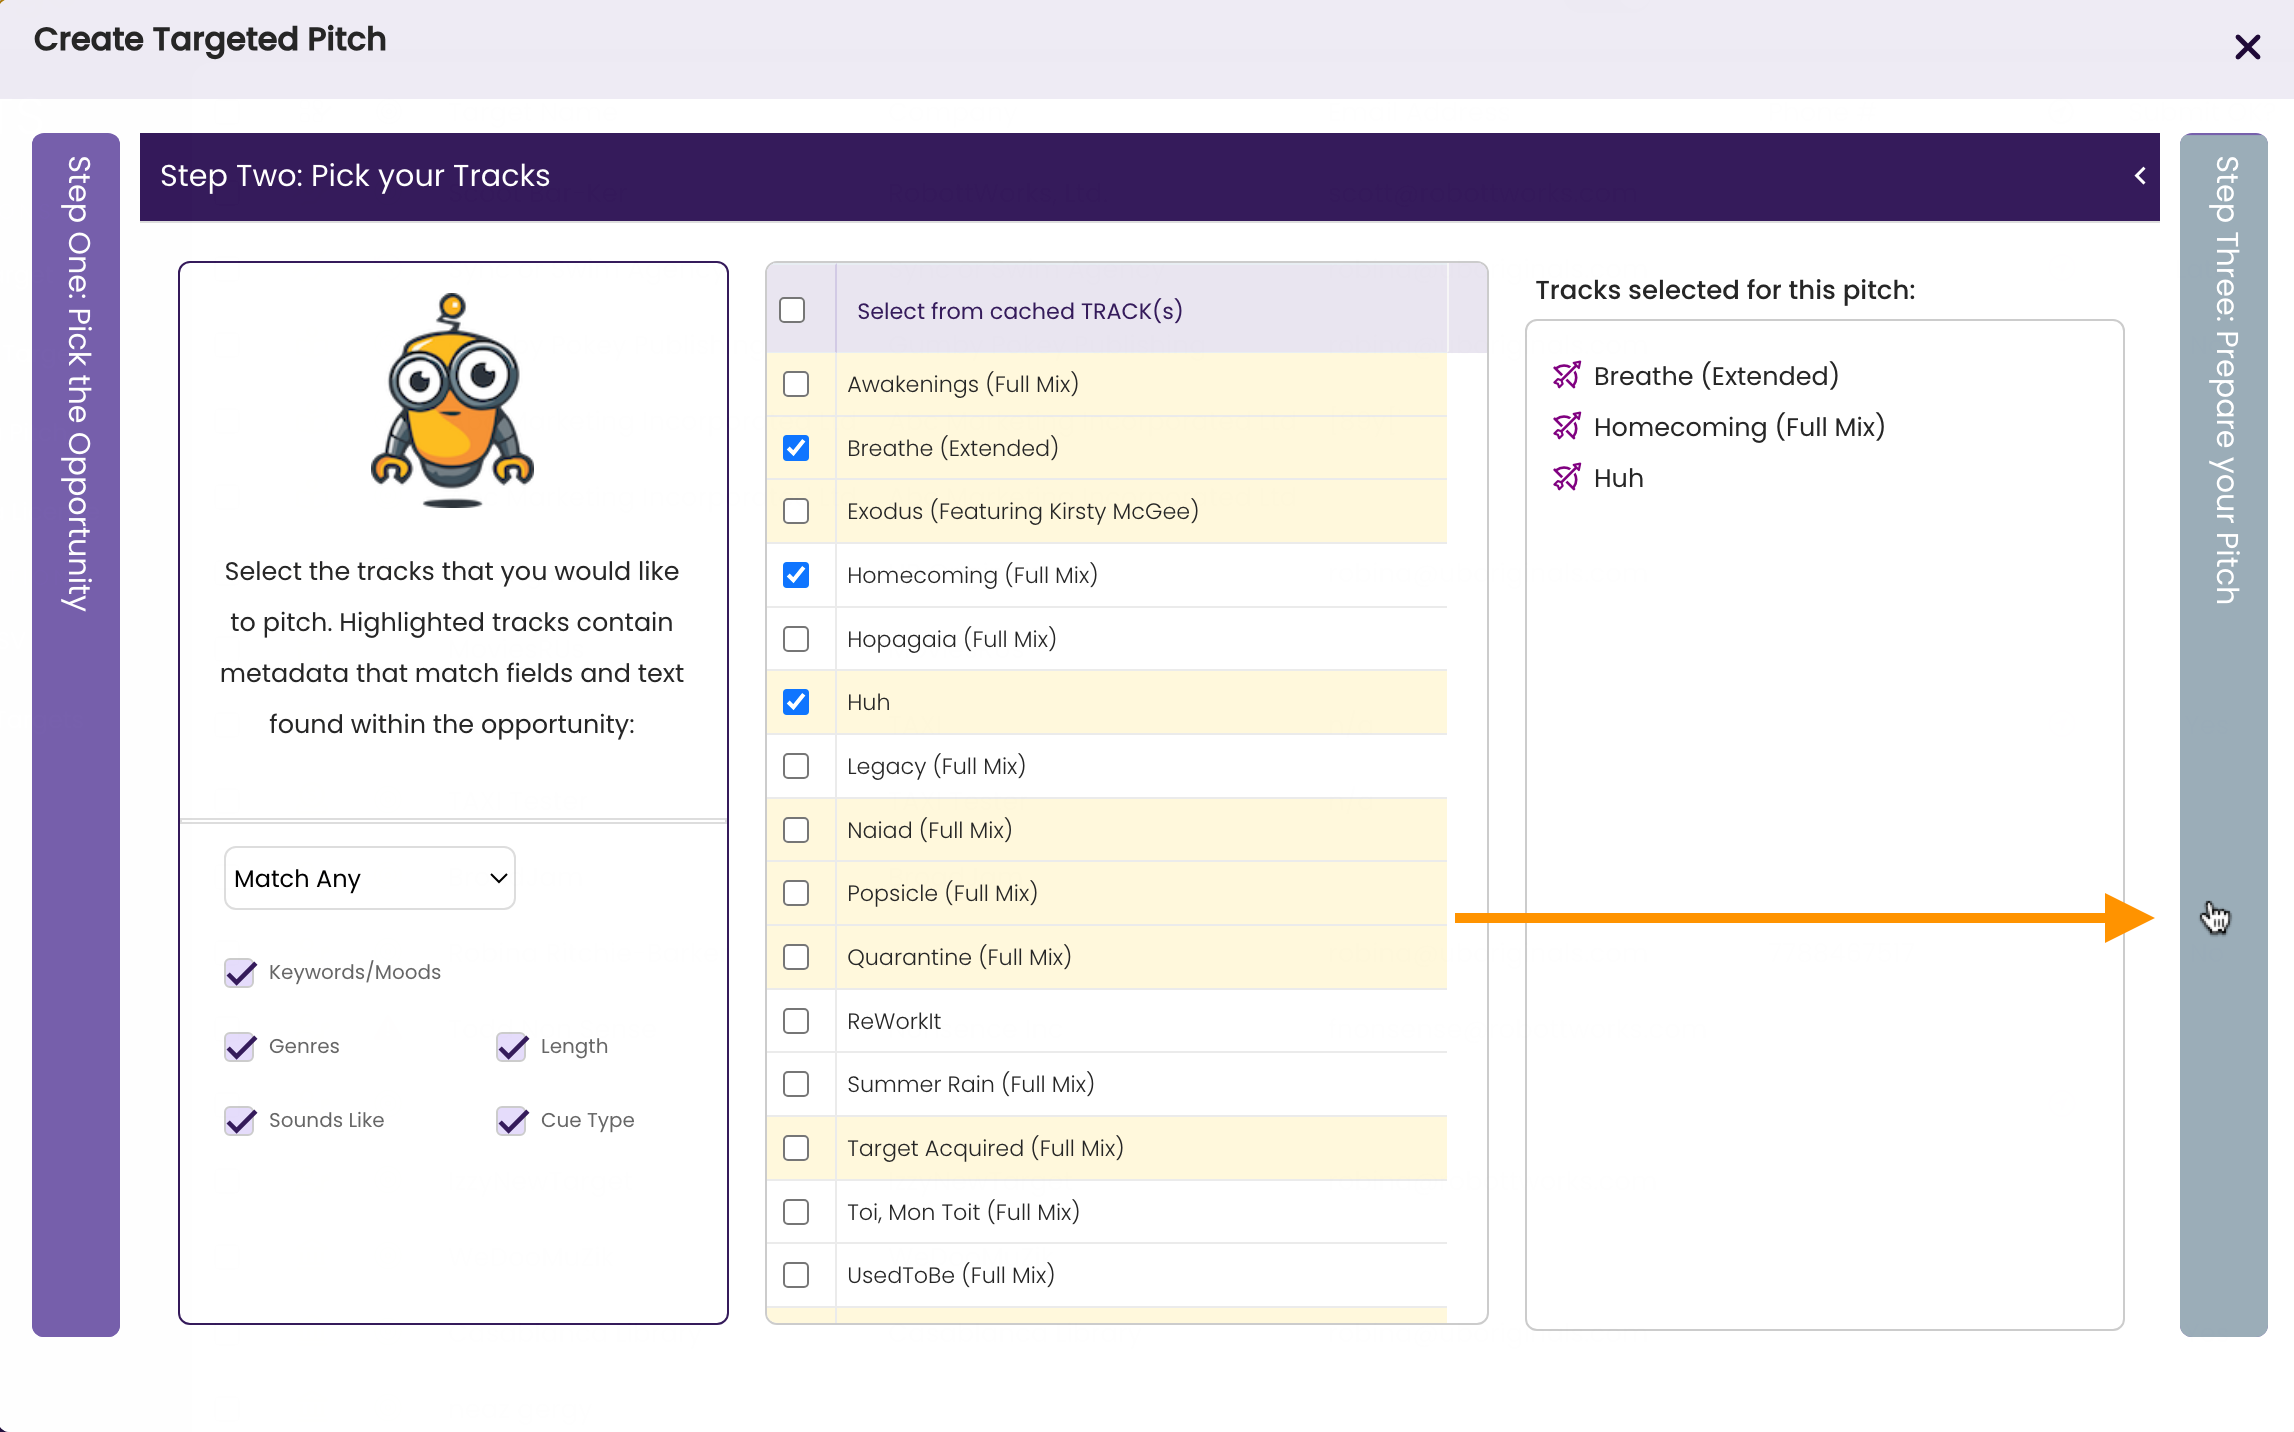
- Select the Opportunity and click Step Two: Pick Your Tracks.
If no Opportunity is present, select opportunity called "Quick Pitch".
- Select the track(s) you wish to pitch to this Target.

- Click Step Three: Prepare your Pitch
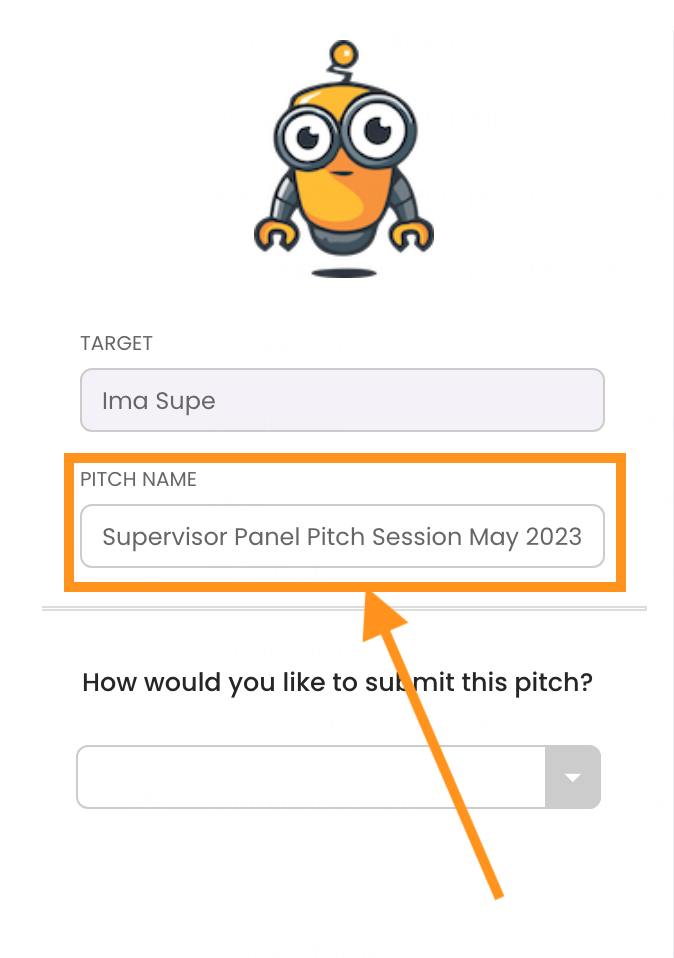
- Edit the Name.
Give the pitch a distinctive name so that you will be able to identify it from a list of multiple pitches.
- Select Upload Tracks to a Website
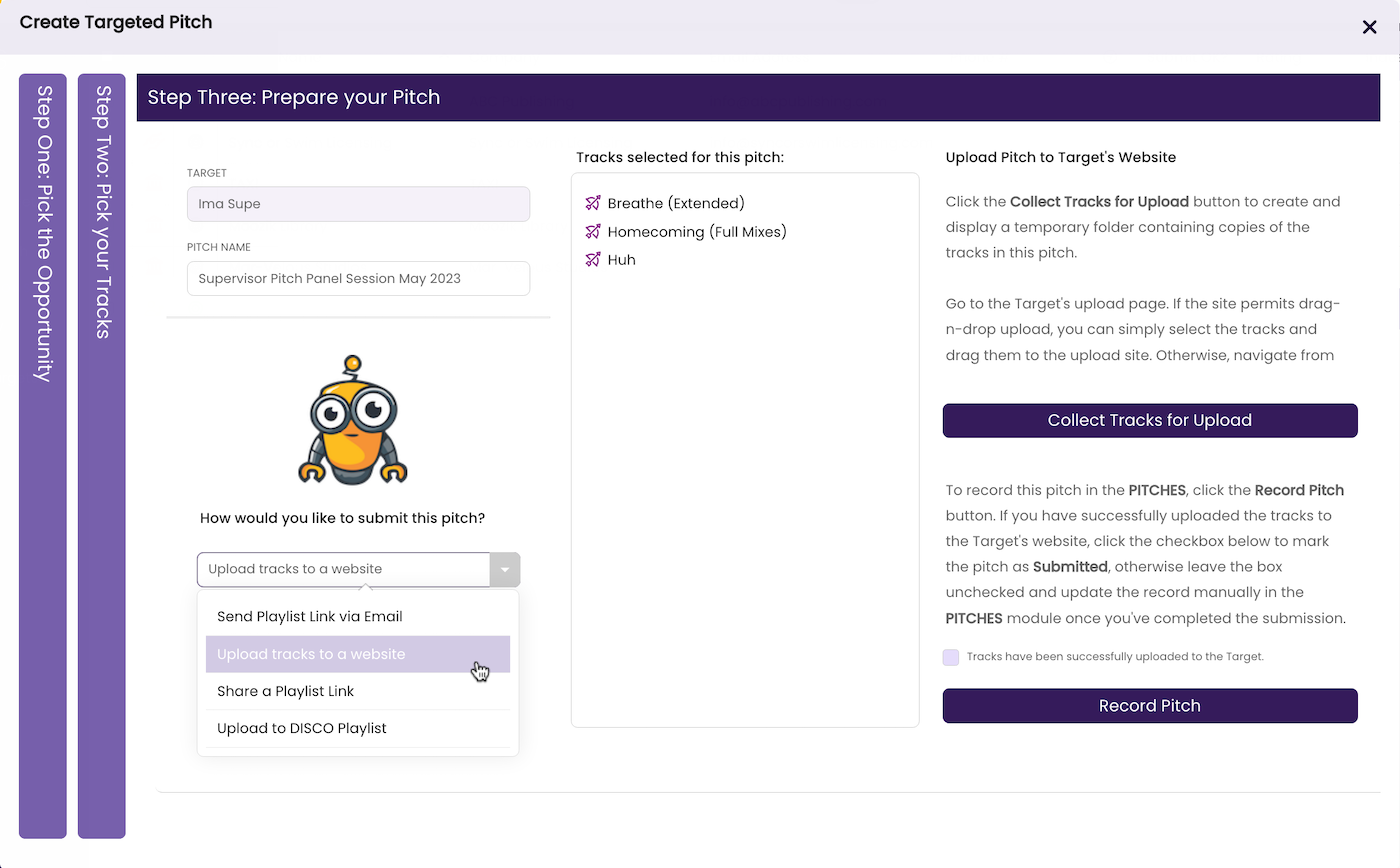
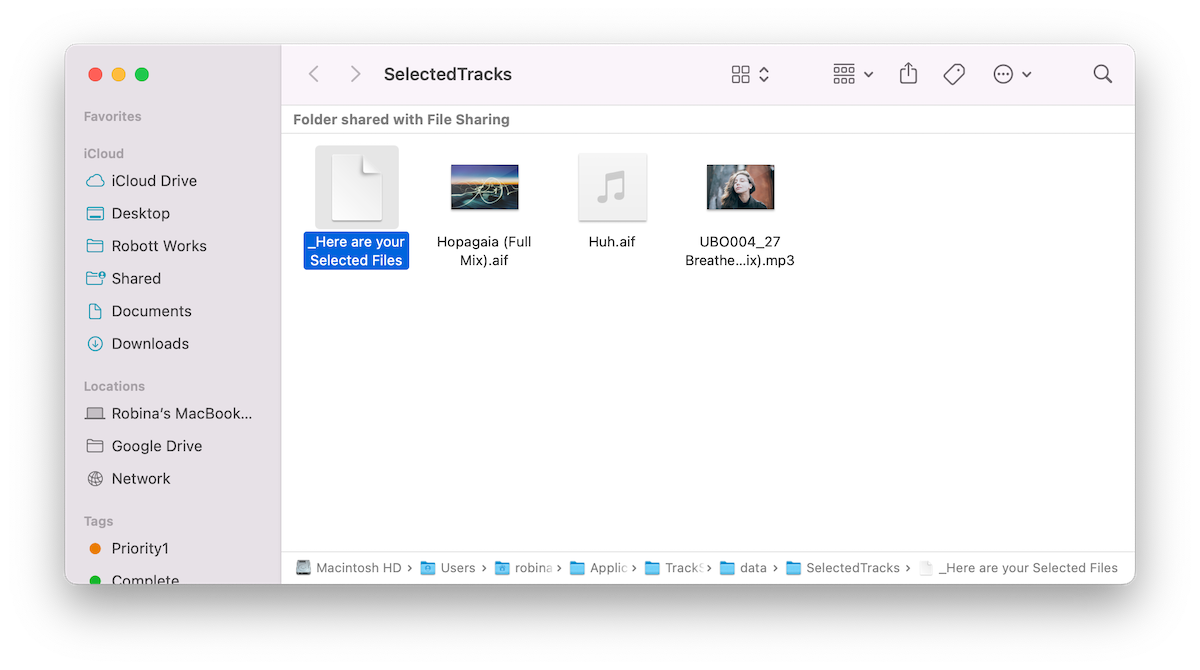
- Click Collect Tracks for Upload.
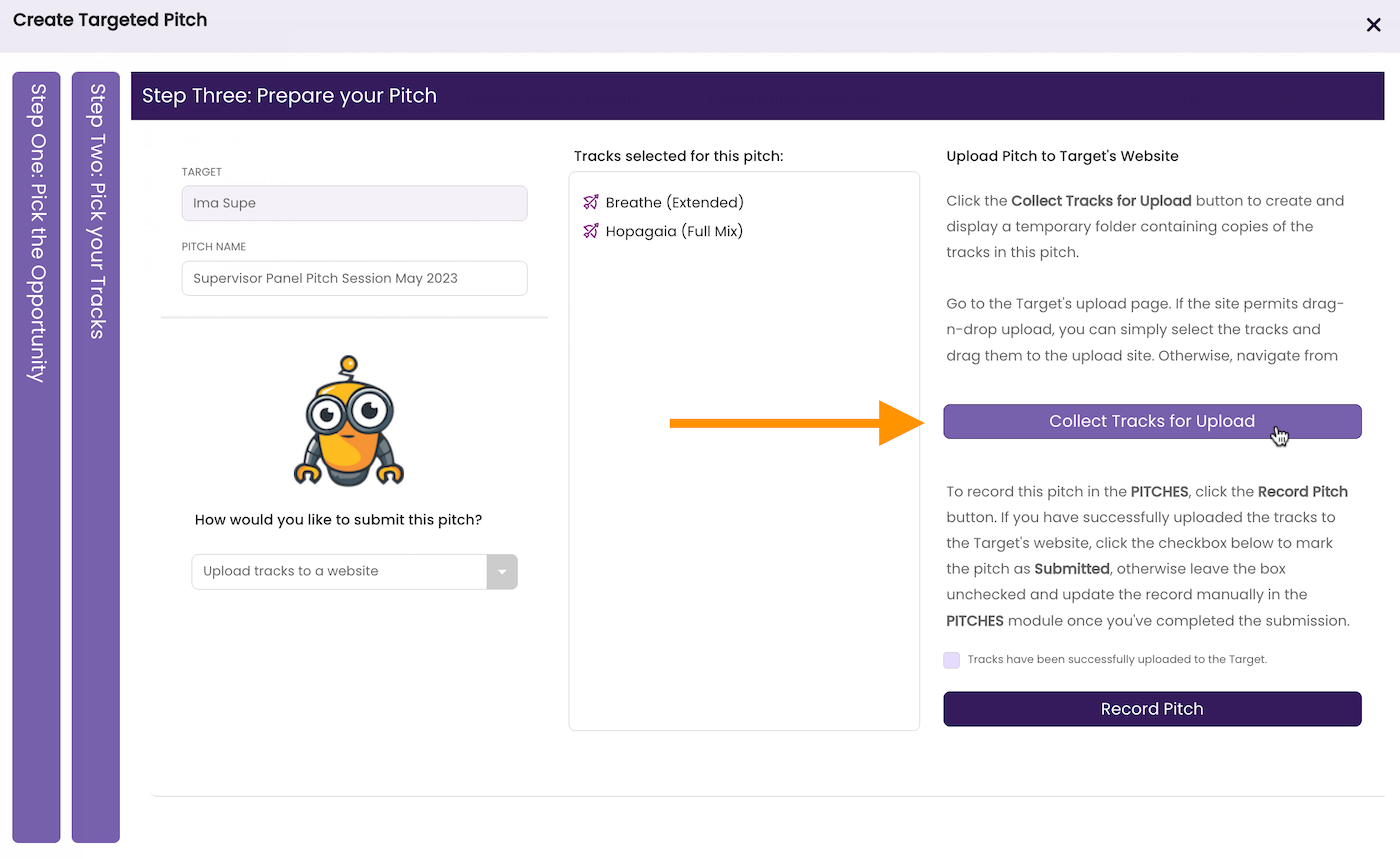
This creates a temporary folder containing the tracks you’re pitching so that you can easily select and upload them to the Target.
- Mark the pitch as submitted.
If you’ve uploaded the files and want to mark the pitch as submitted, click the checkbox.

- Click Record Pitch.

A dialog box opens.
- Click Yes.

The pitch is recorded in the PITCHES module, the window refreshes and the PITCH DETAILS Tab opens so you can record more details about the pitch.
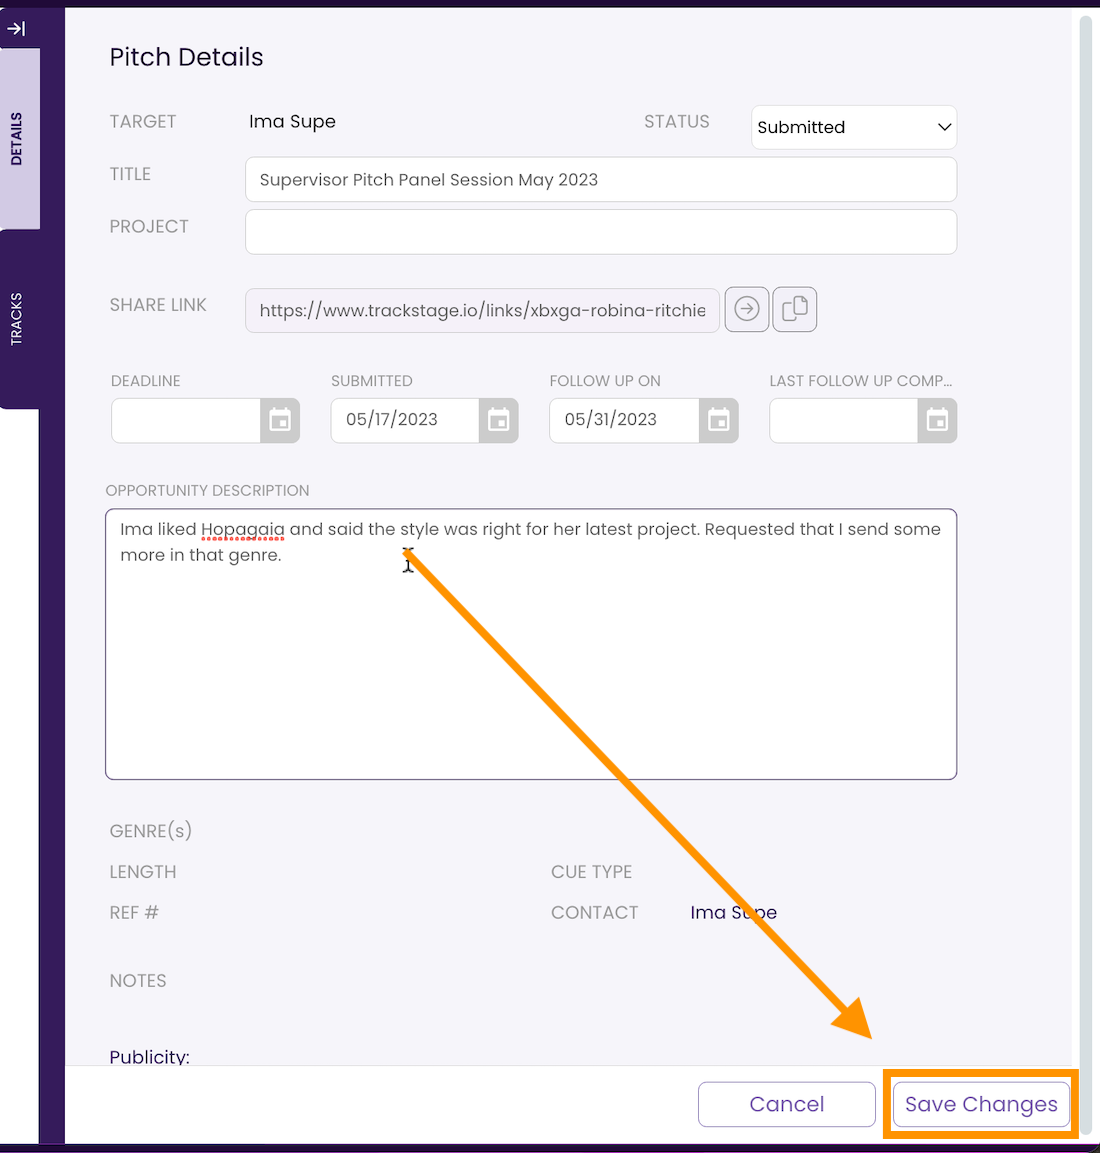
- Add a Description (if desired).
Make sure to add some notes so that you can understand your specific goals for this pitch and refer to them as you build this relationship.
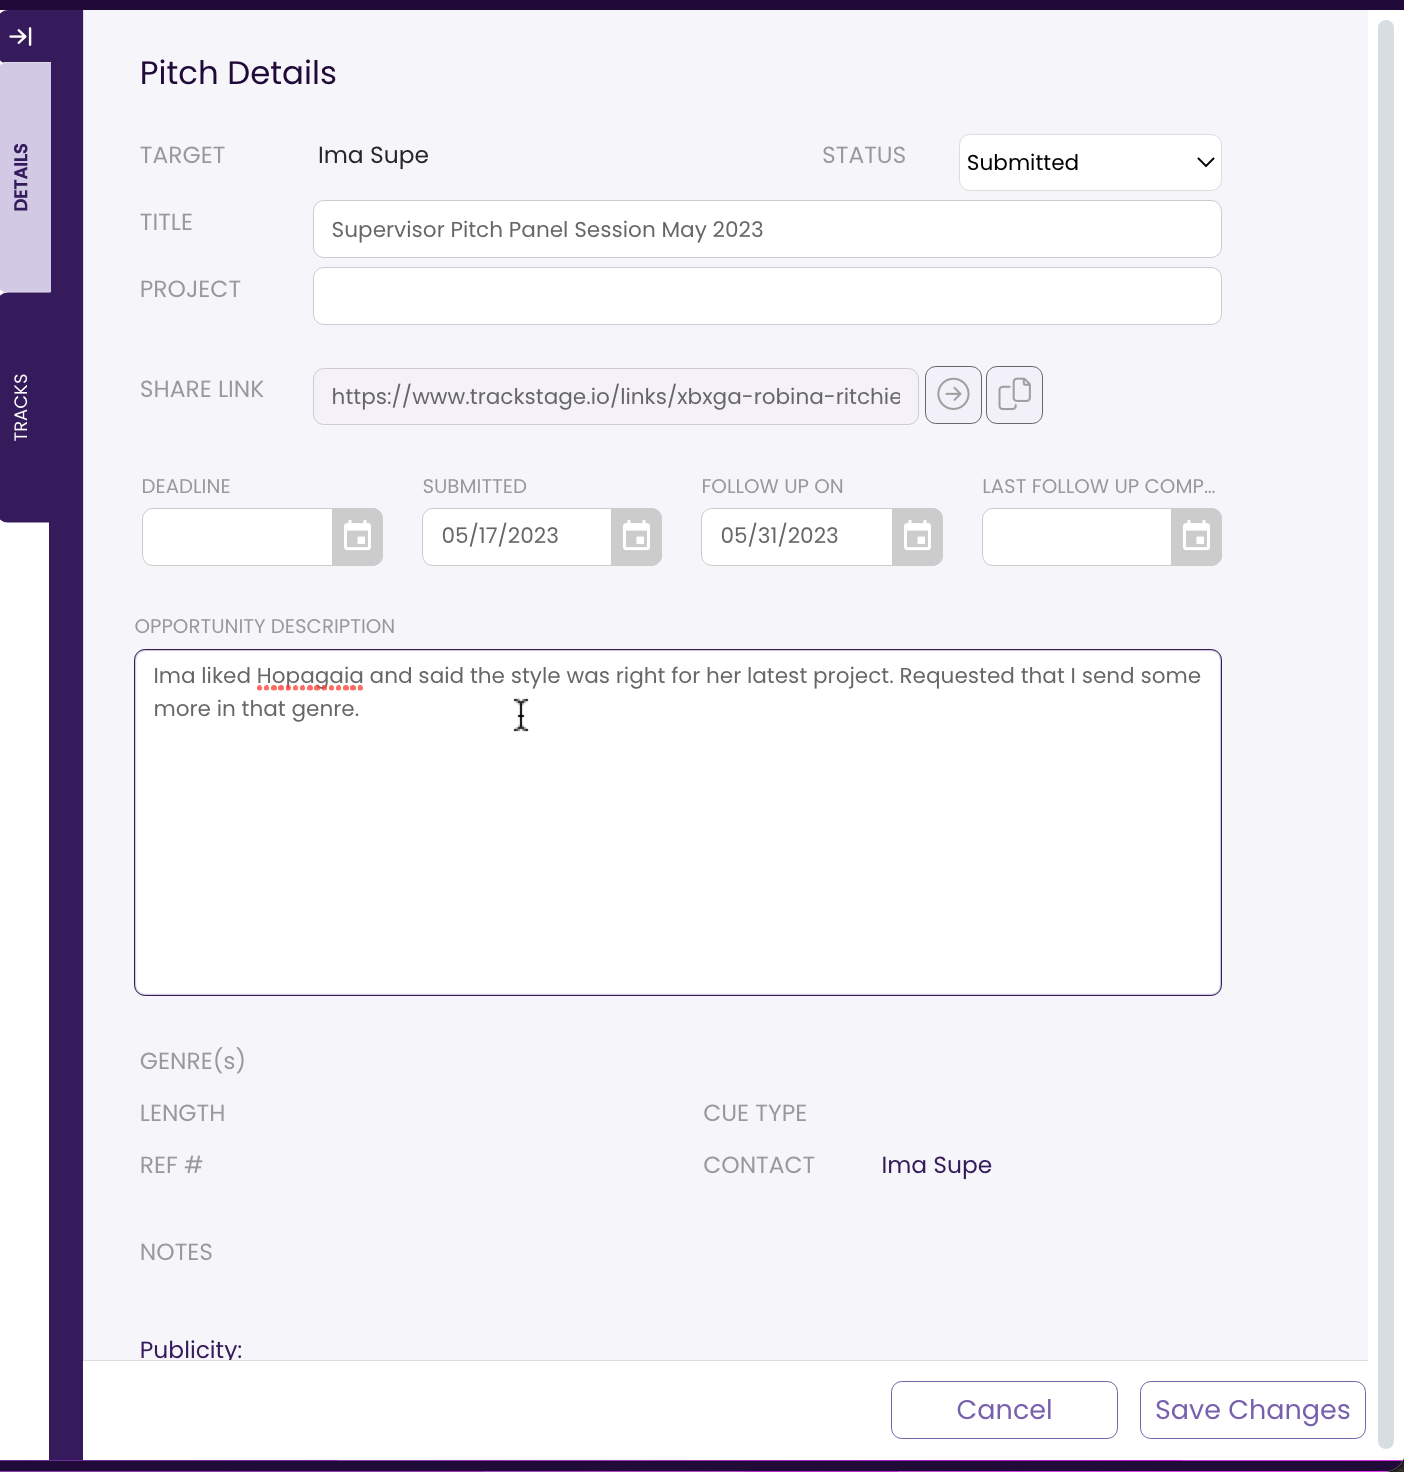
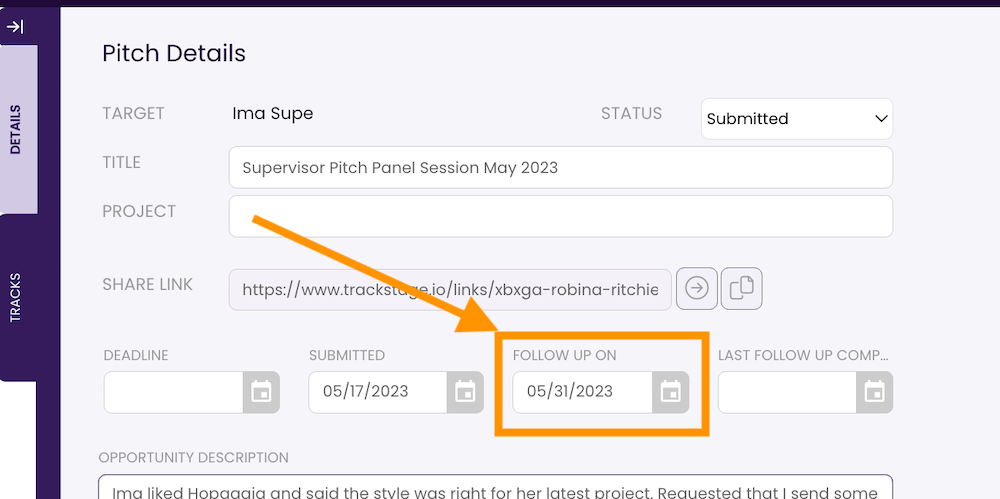
- Adjust the Follow-Up date, if desired.
A default two-week follow-up date is set and will show up in your DASHBOARD as the date draws near.
- Click Save Changes.